Solderless installation
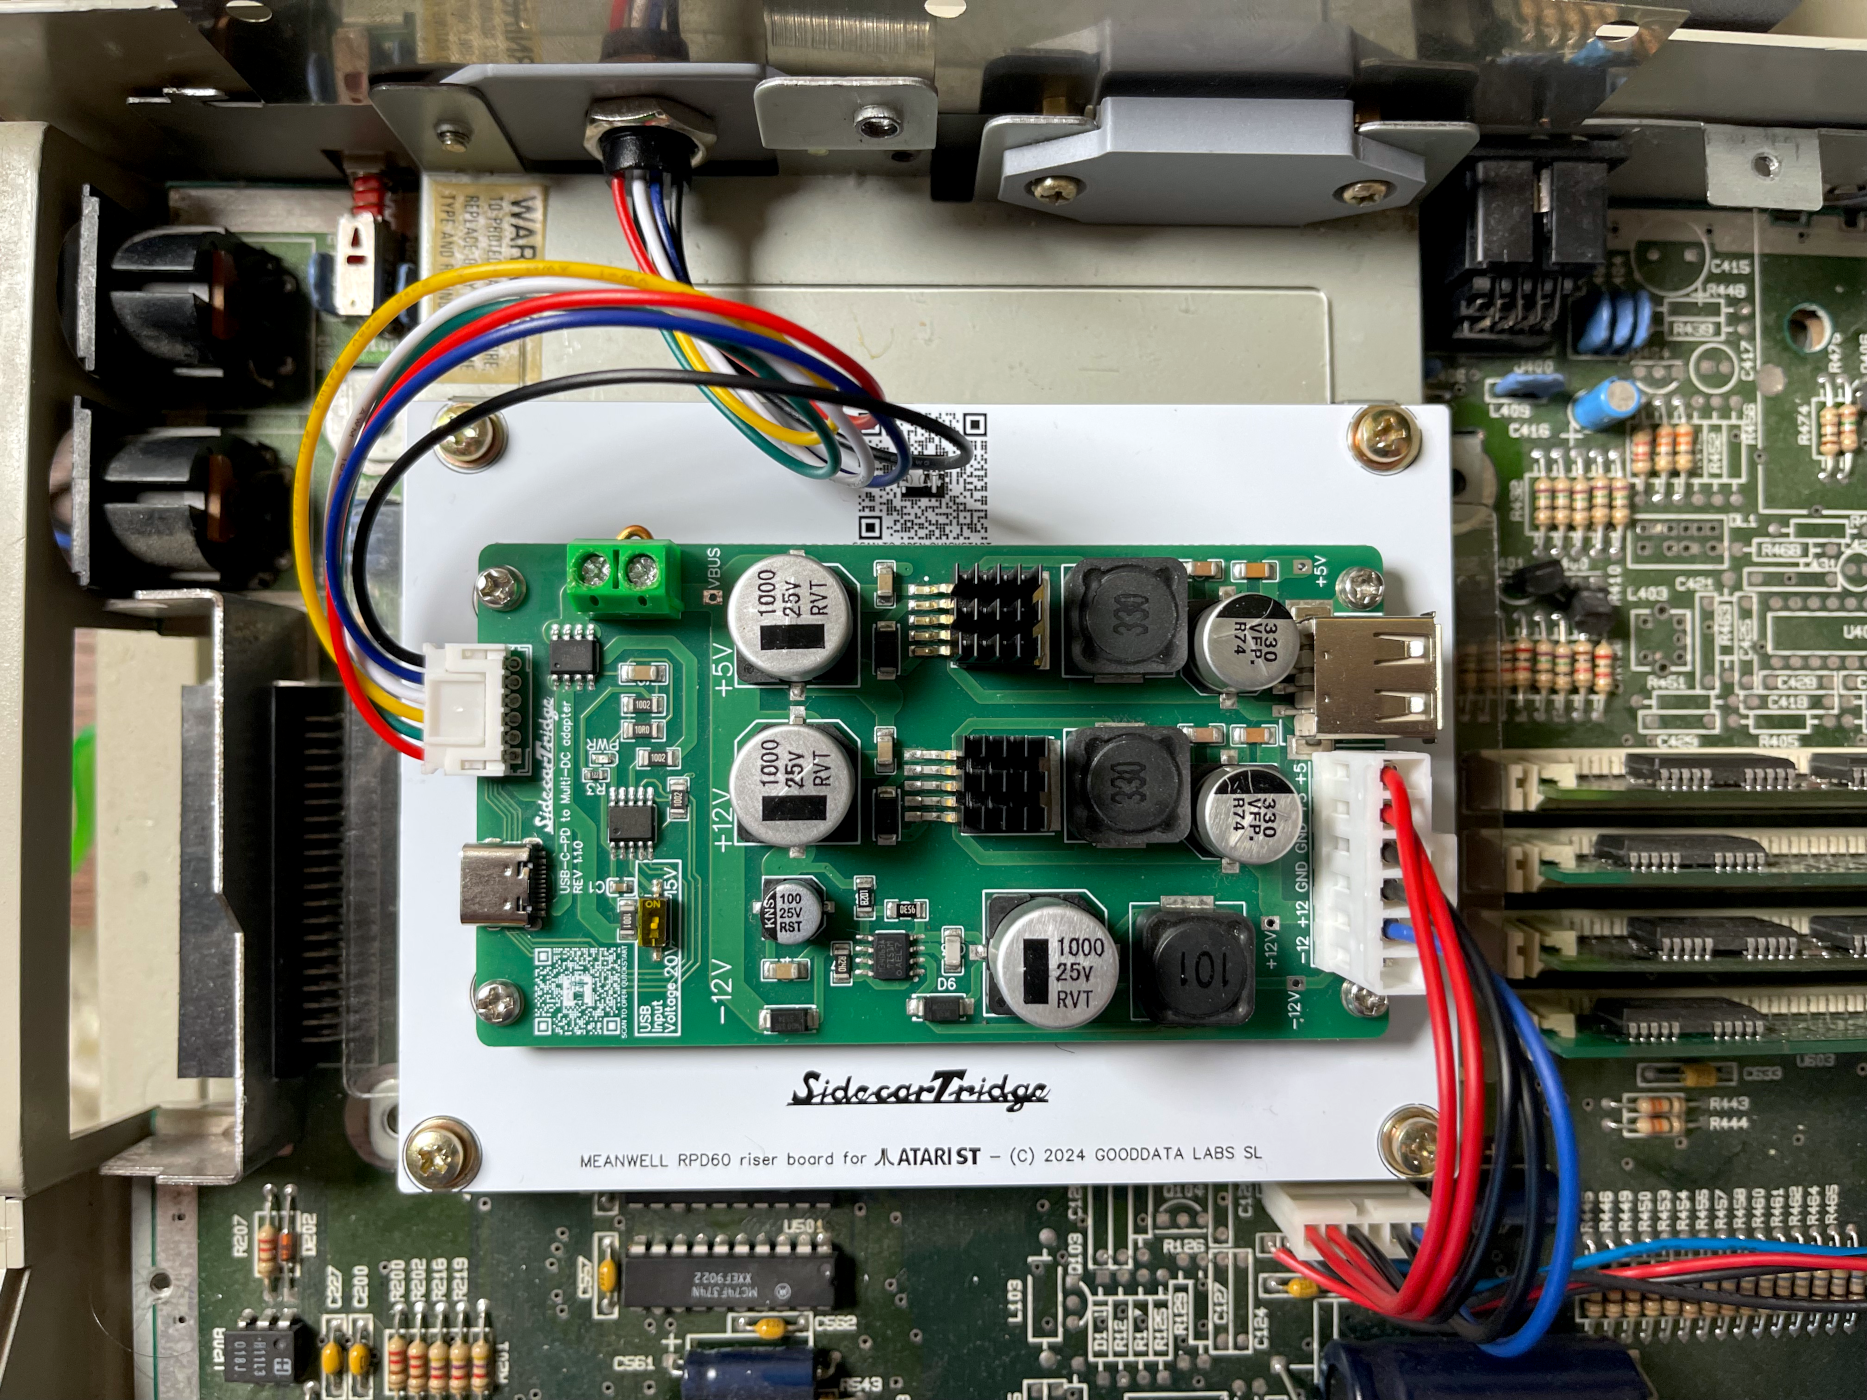
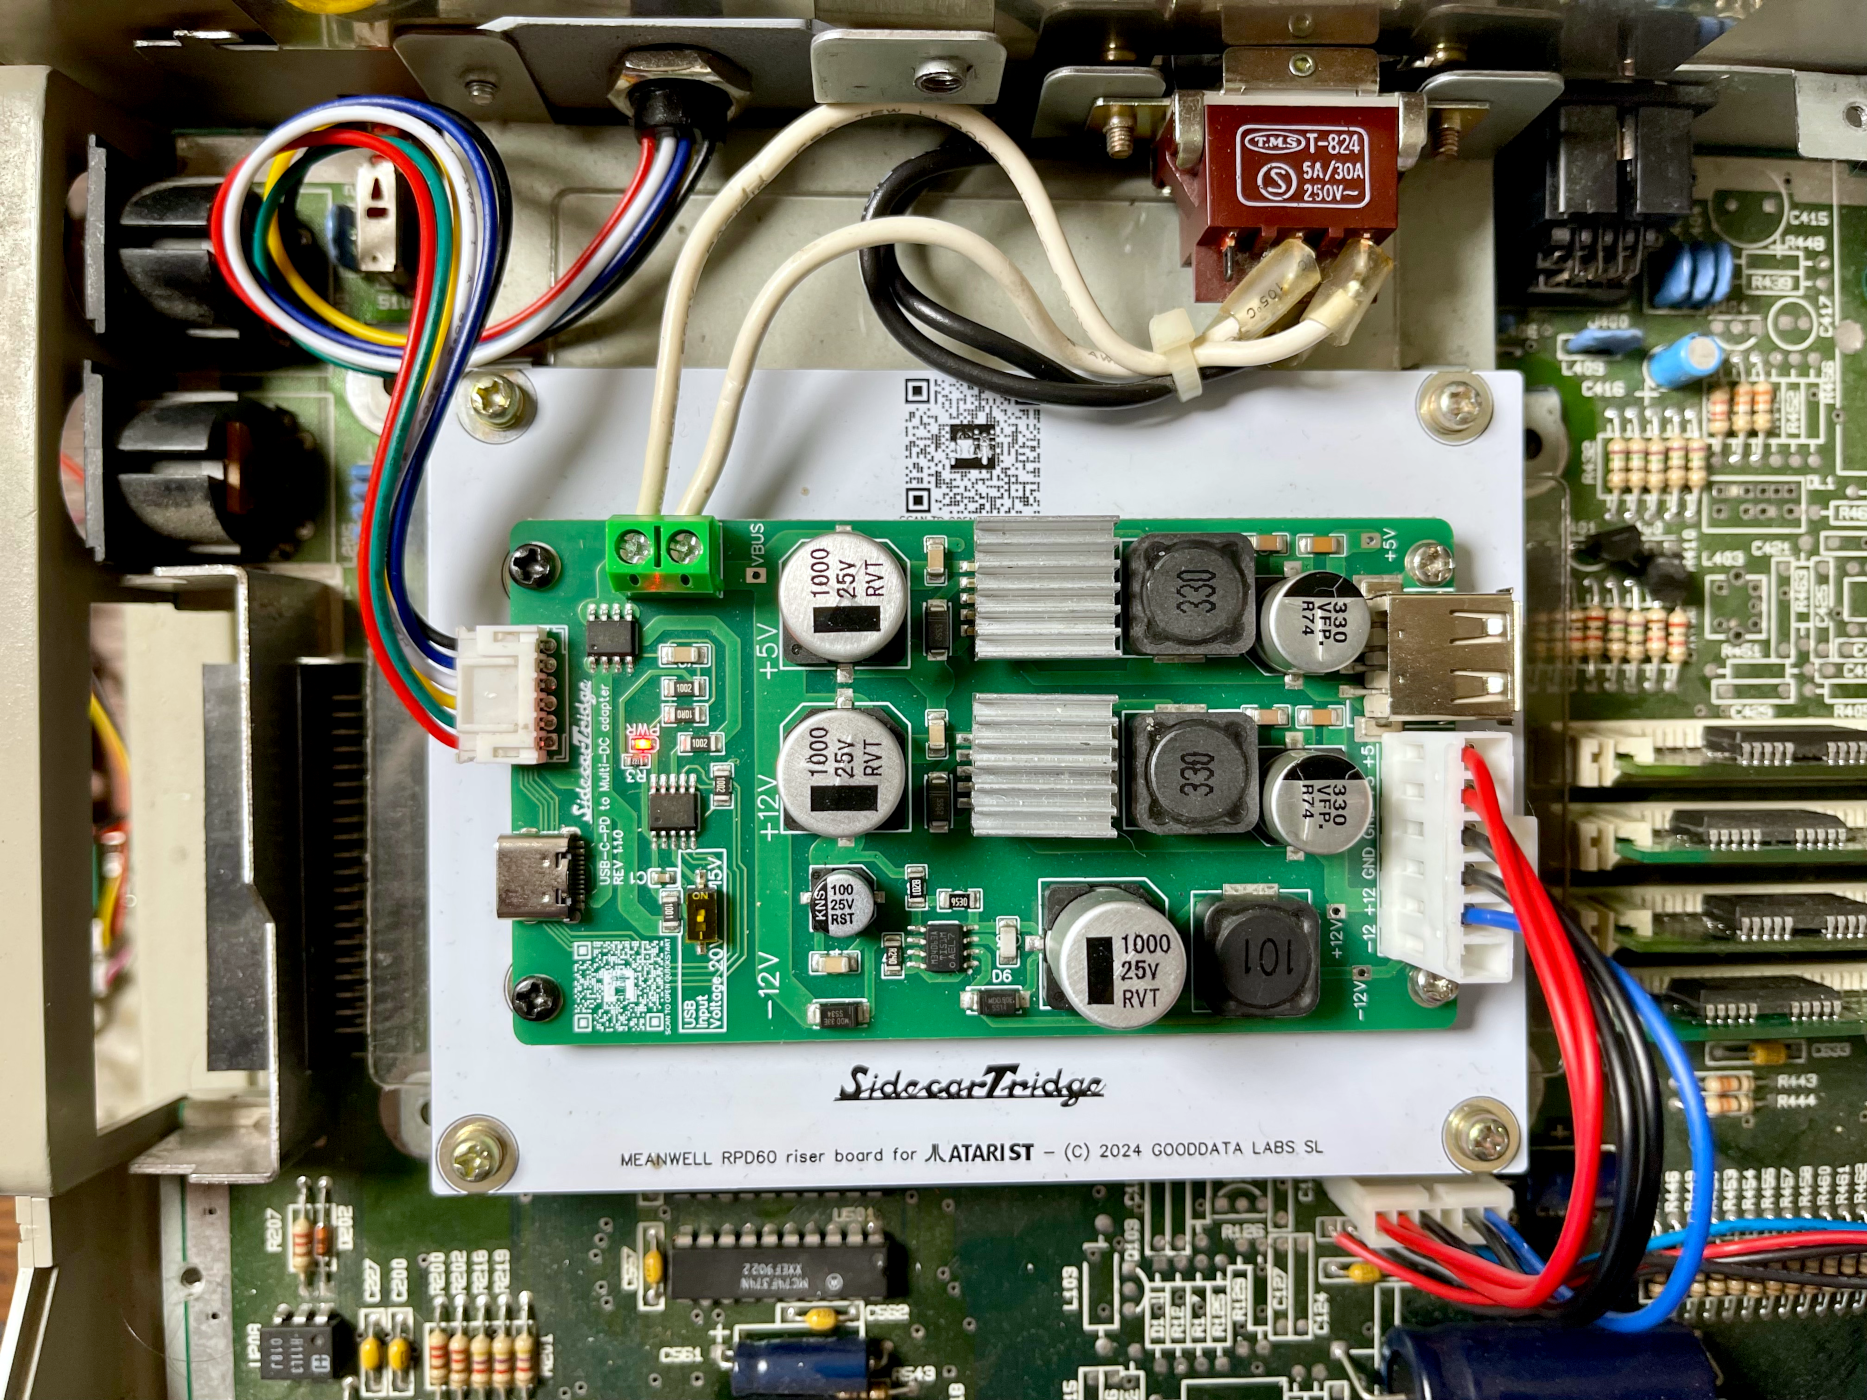
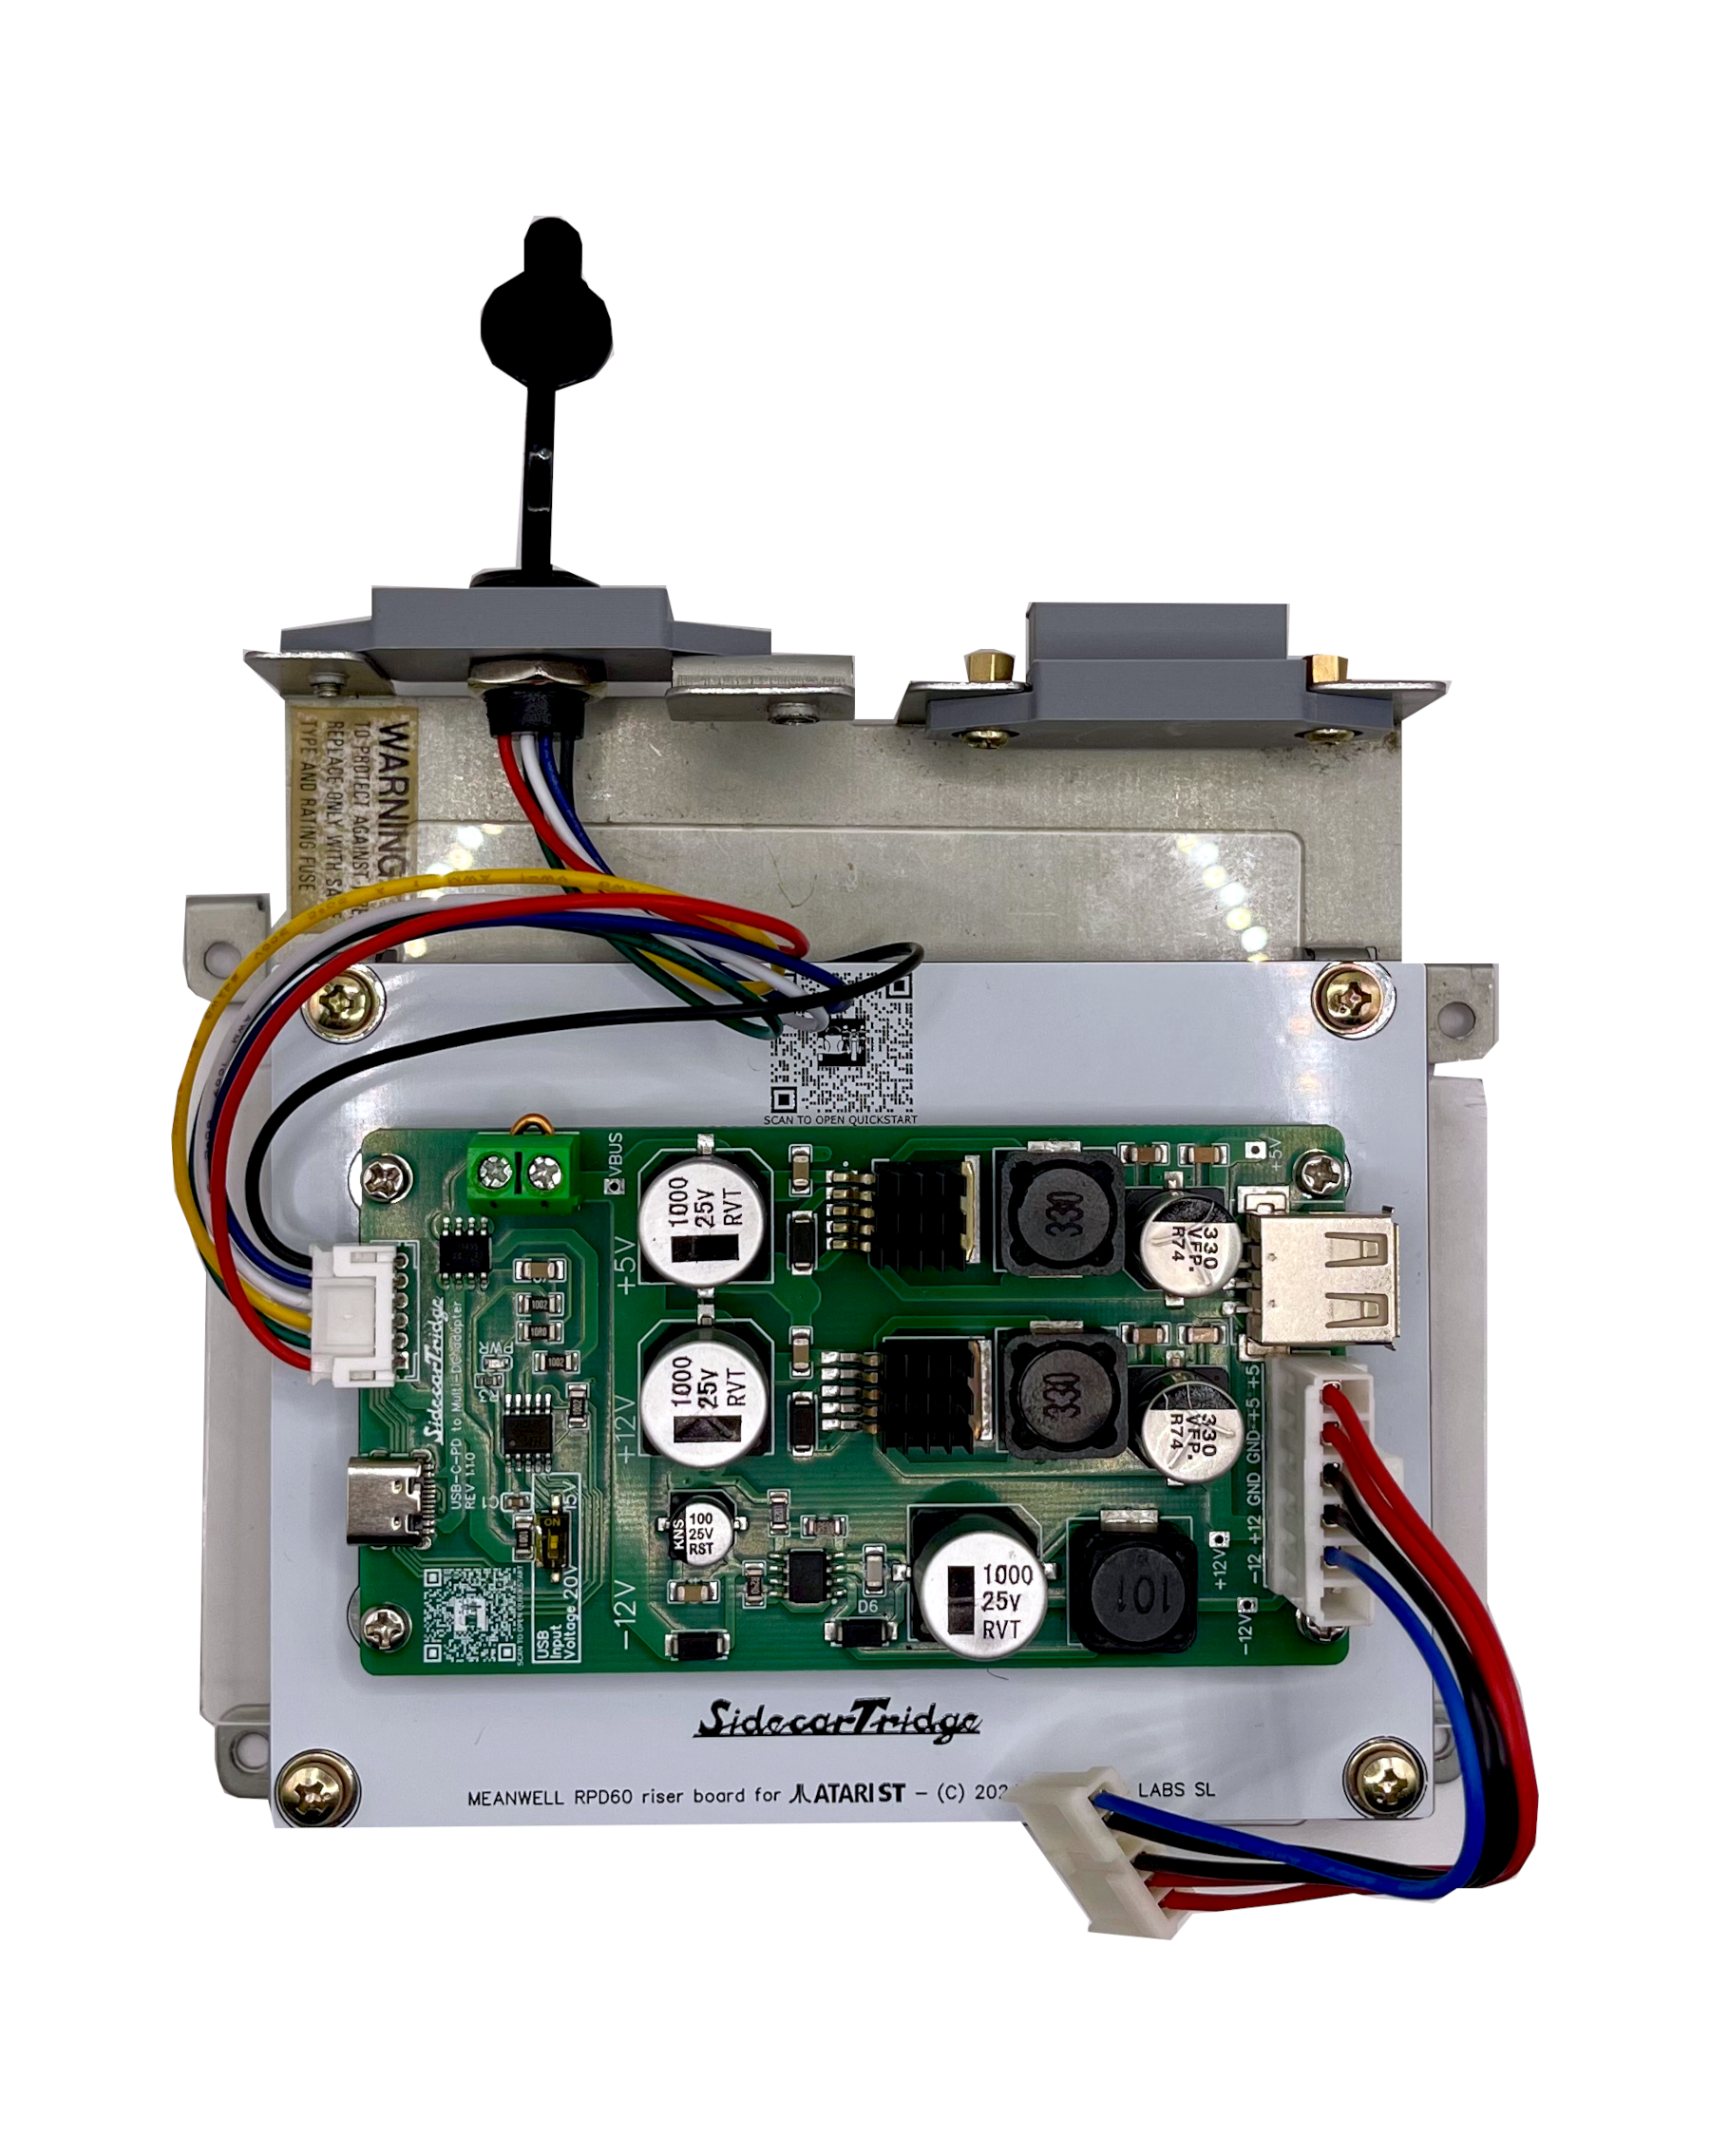
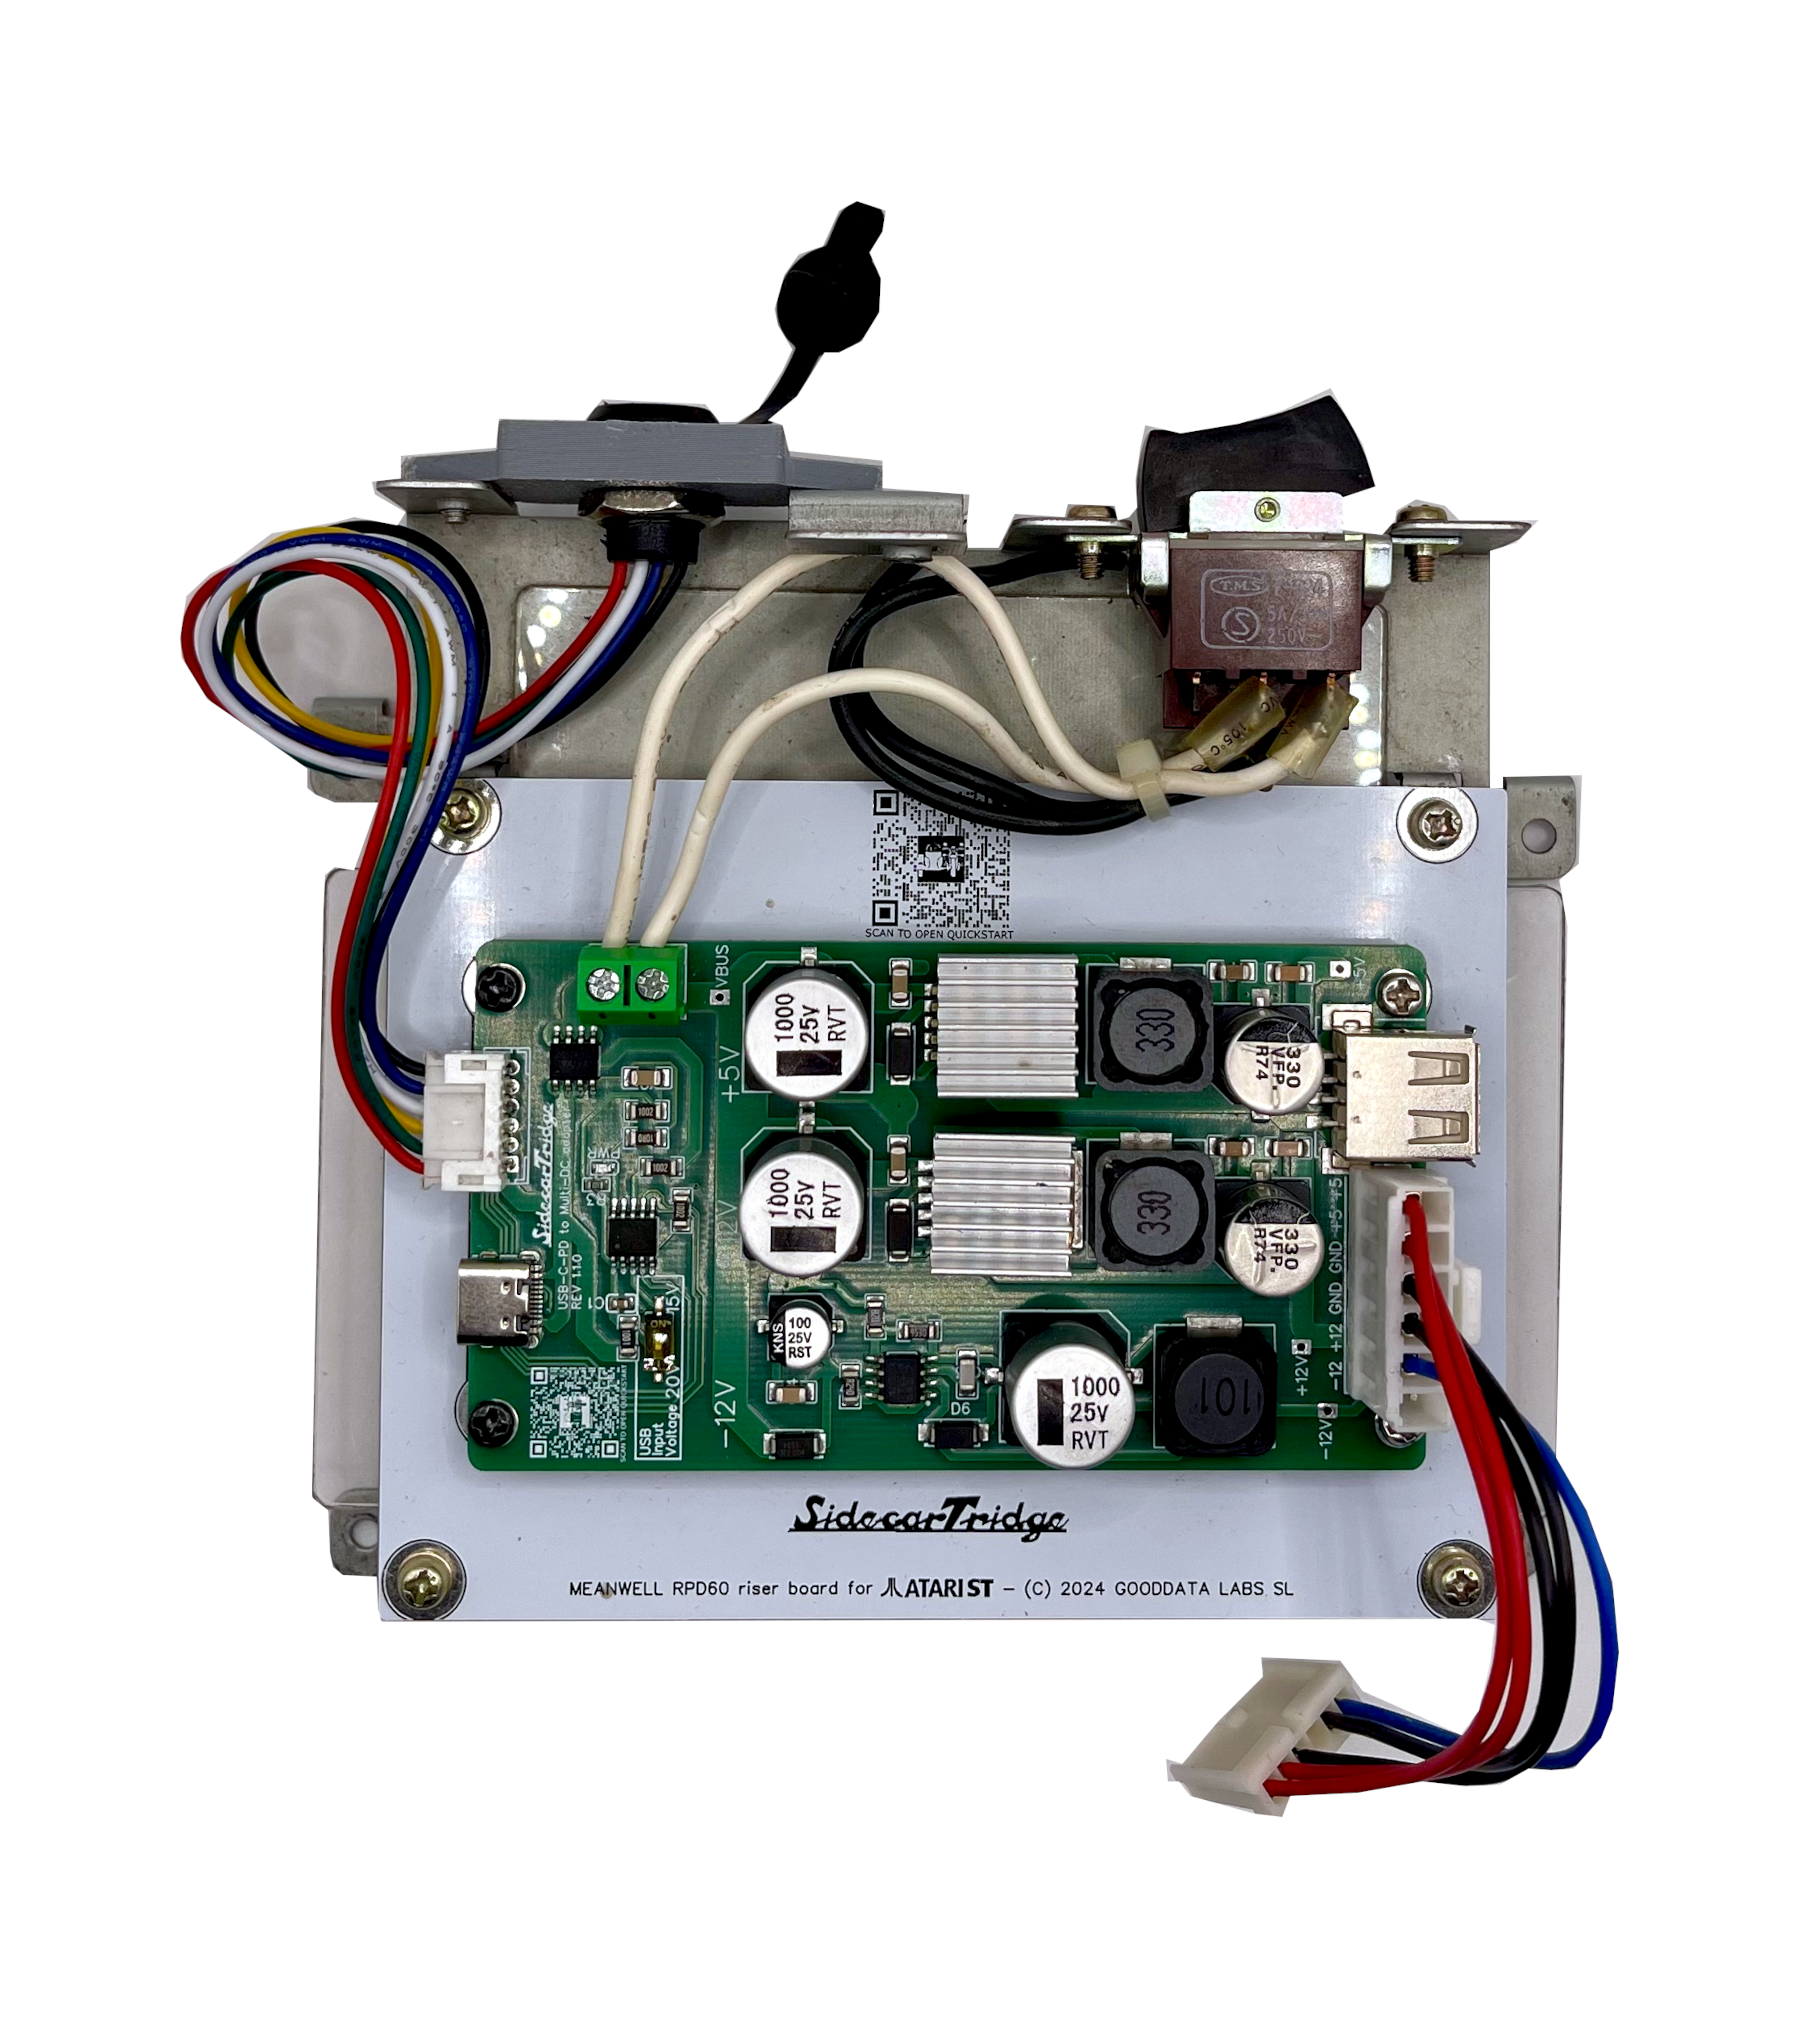
Plug-in harnesses replace the original PSU connectors. No soldering on the motherboard, no chassis modifications, no permanent changes.

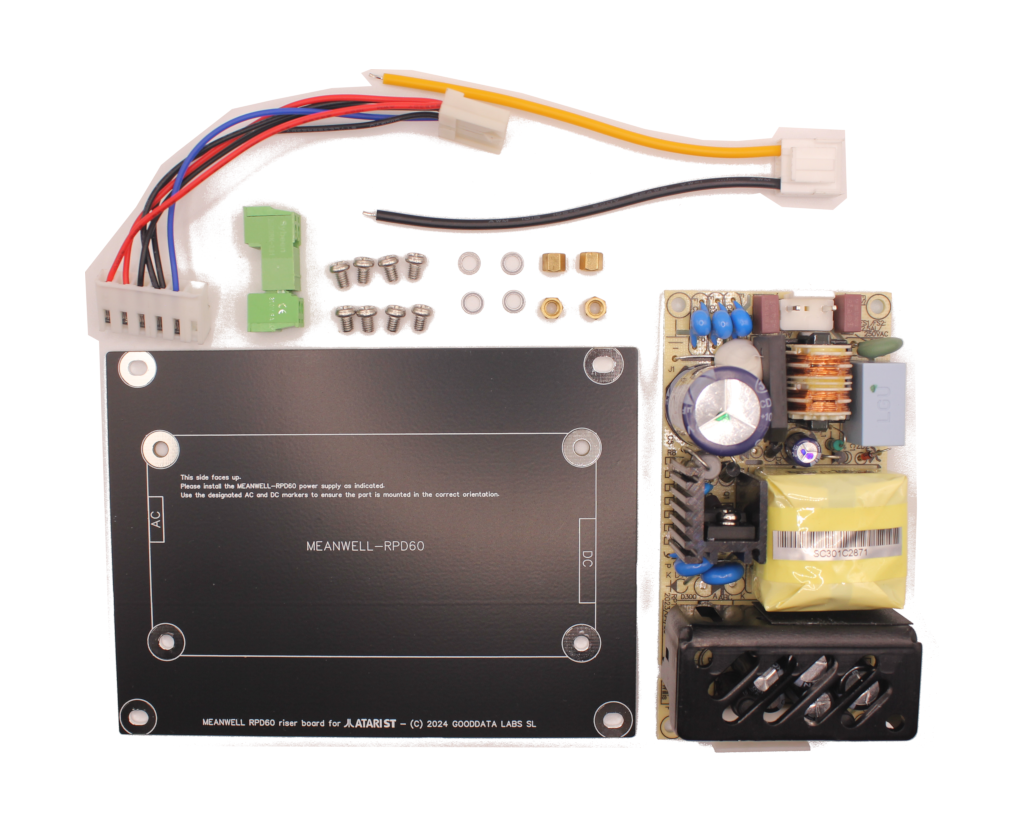
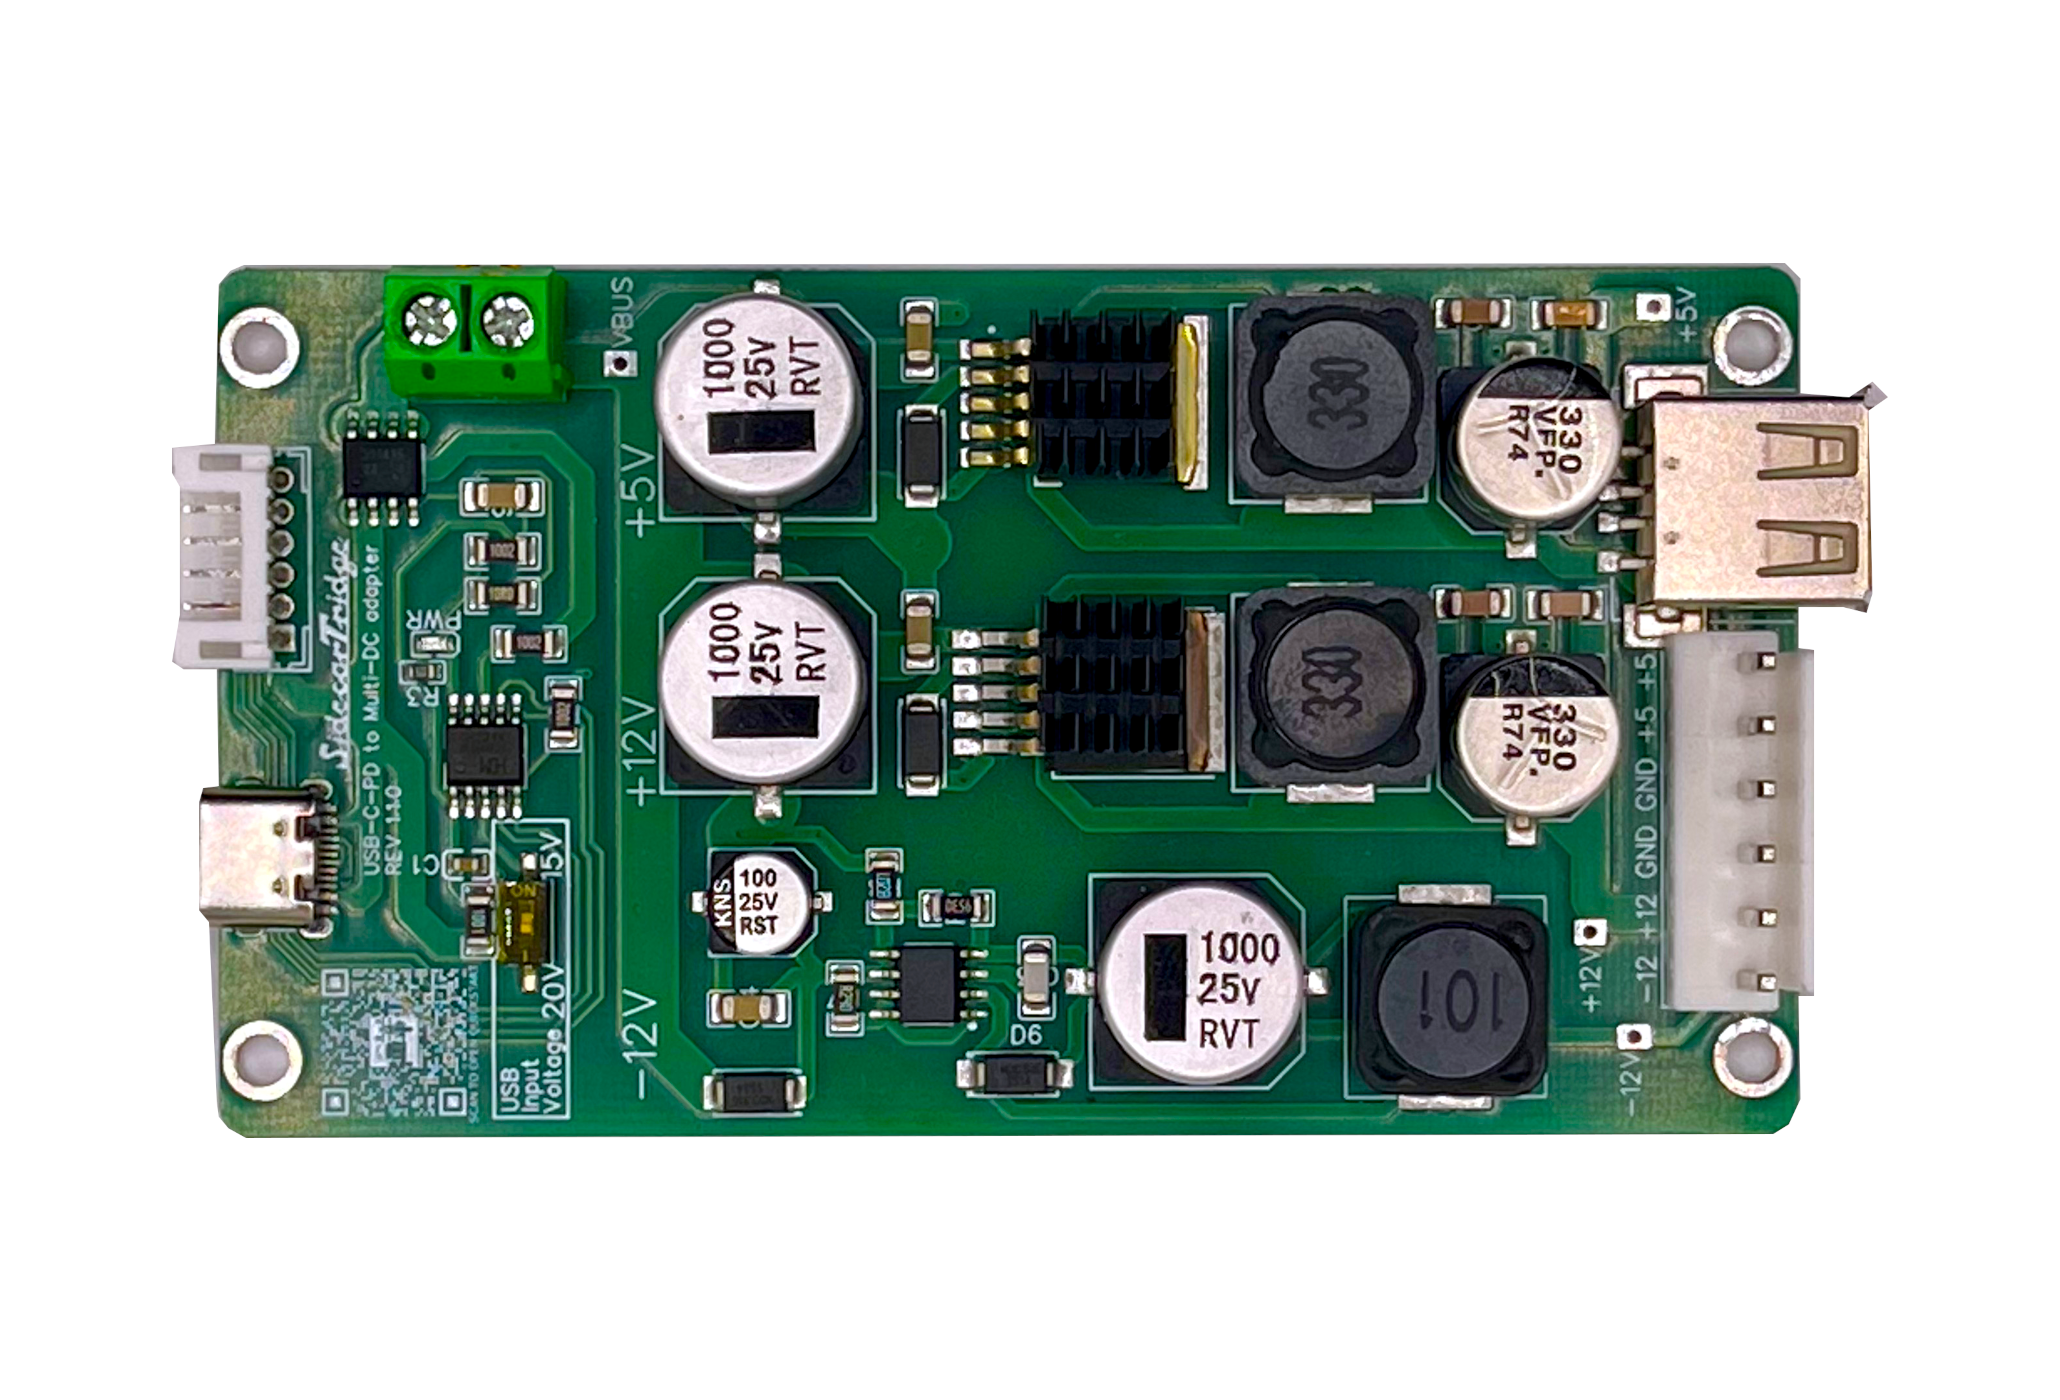
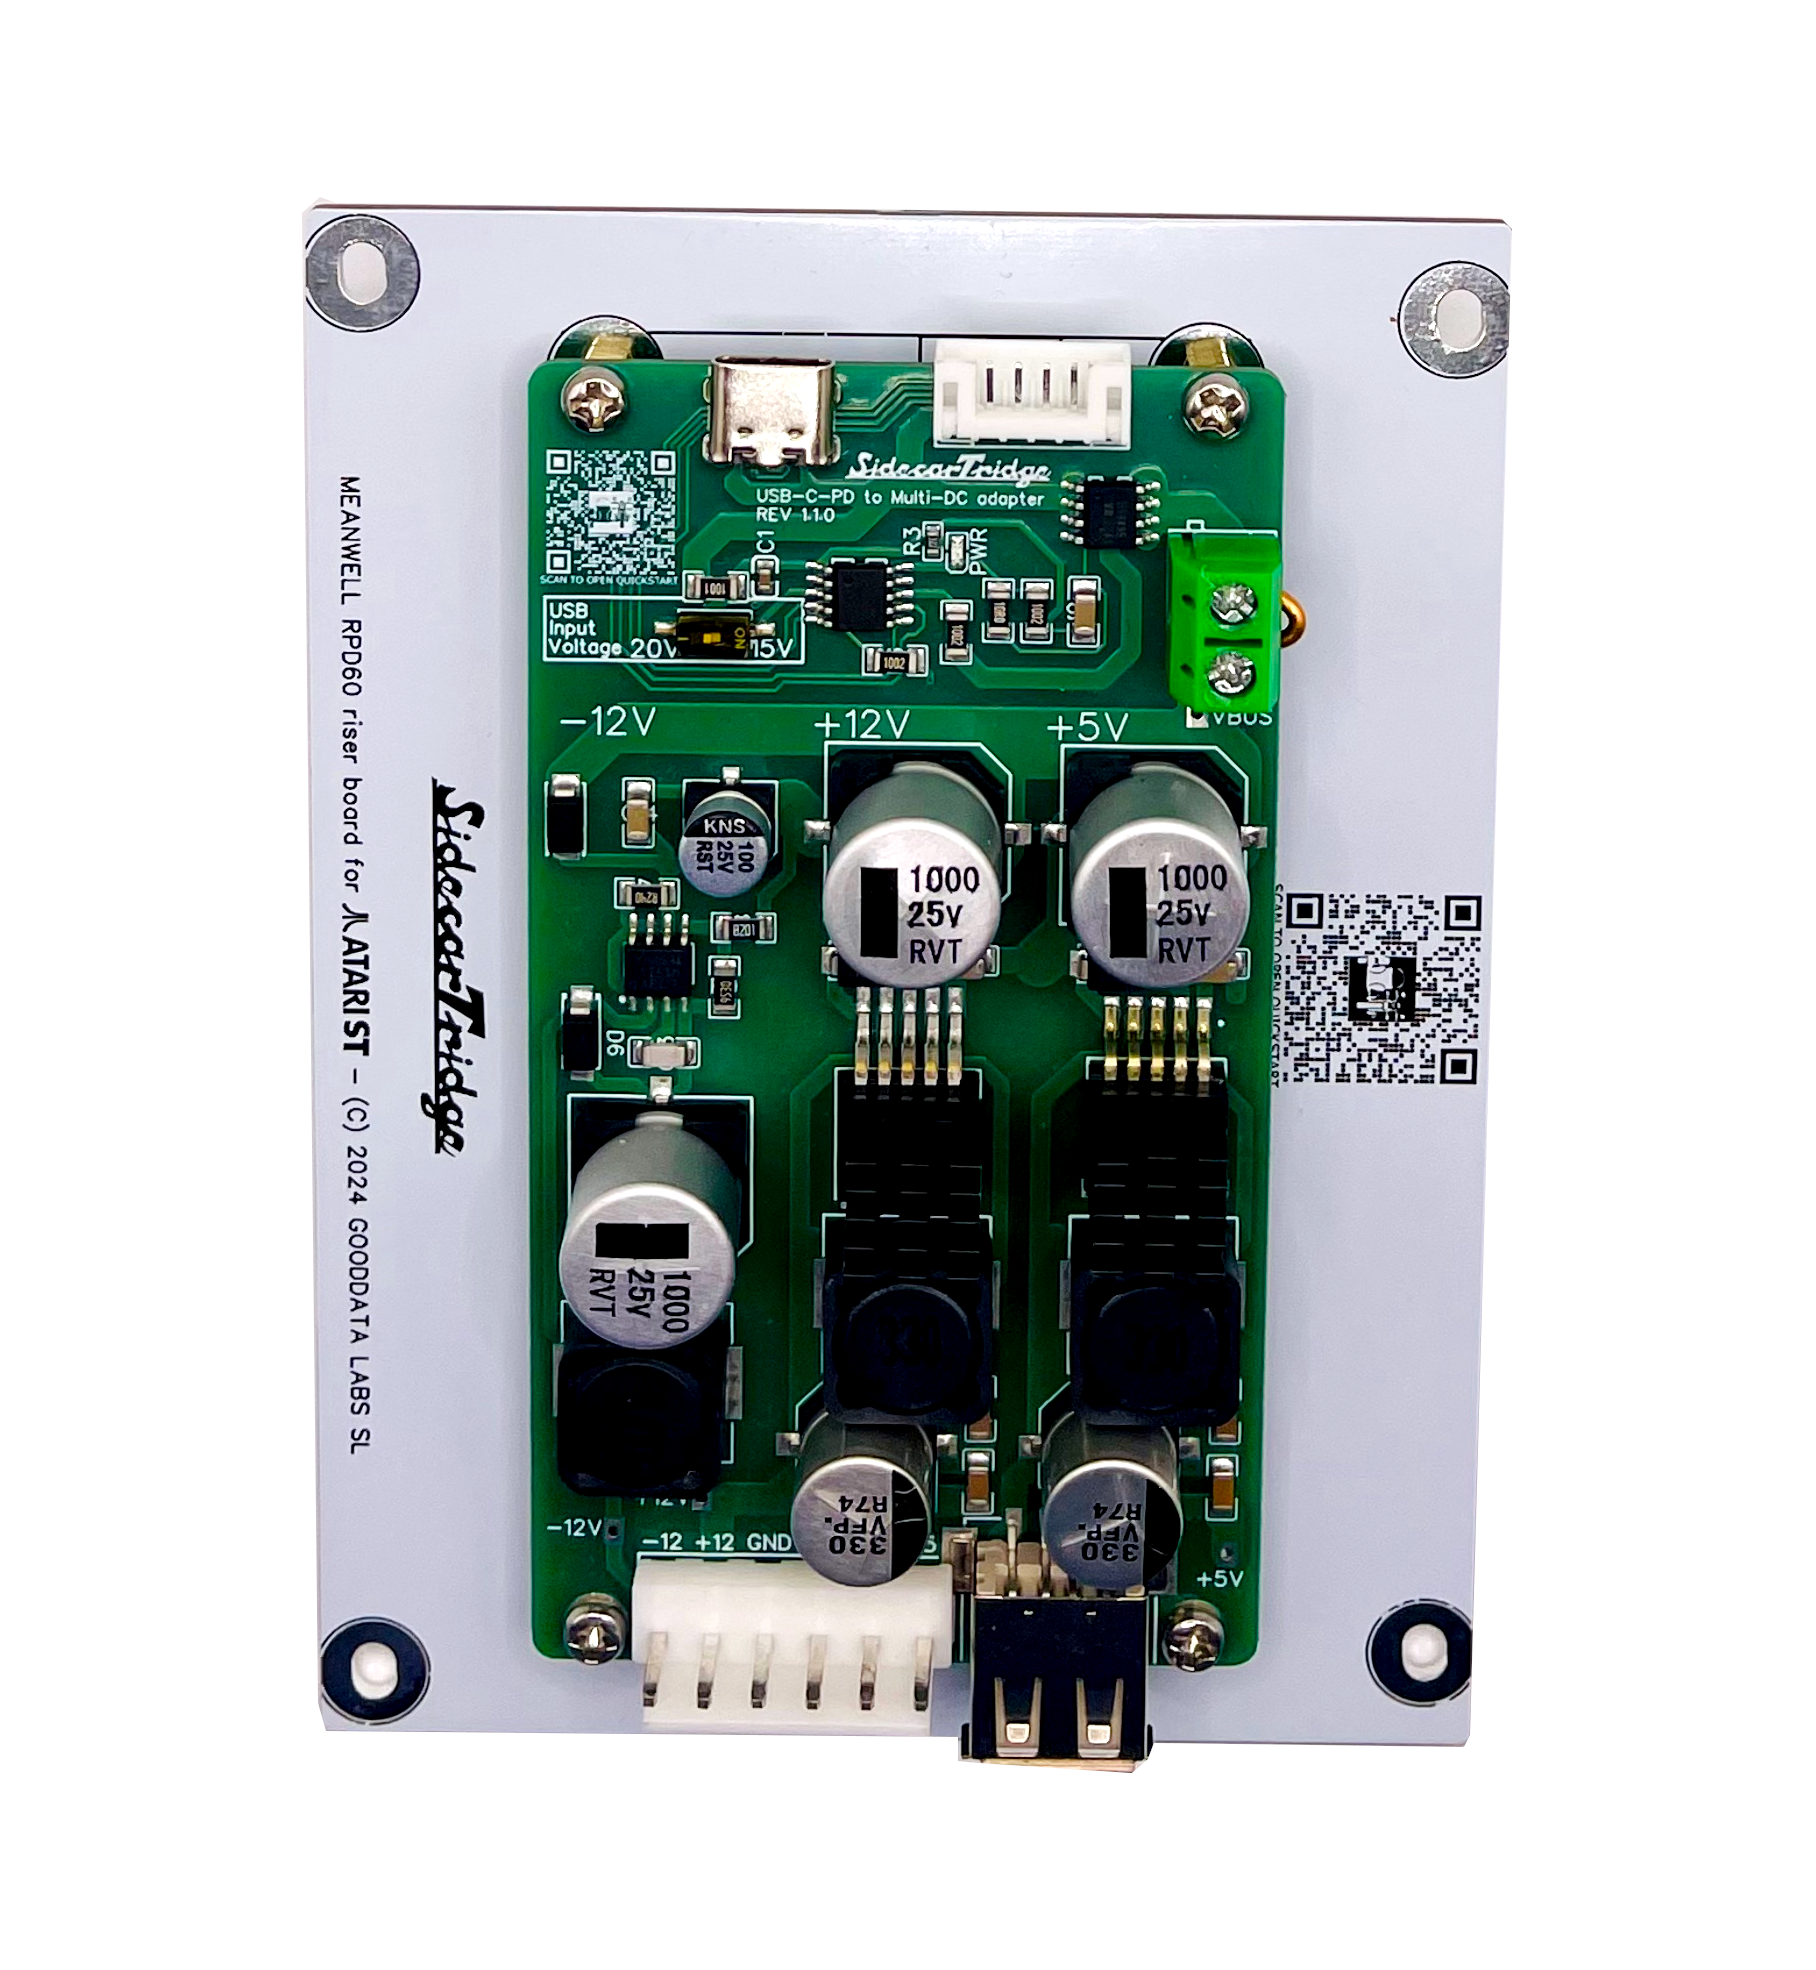
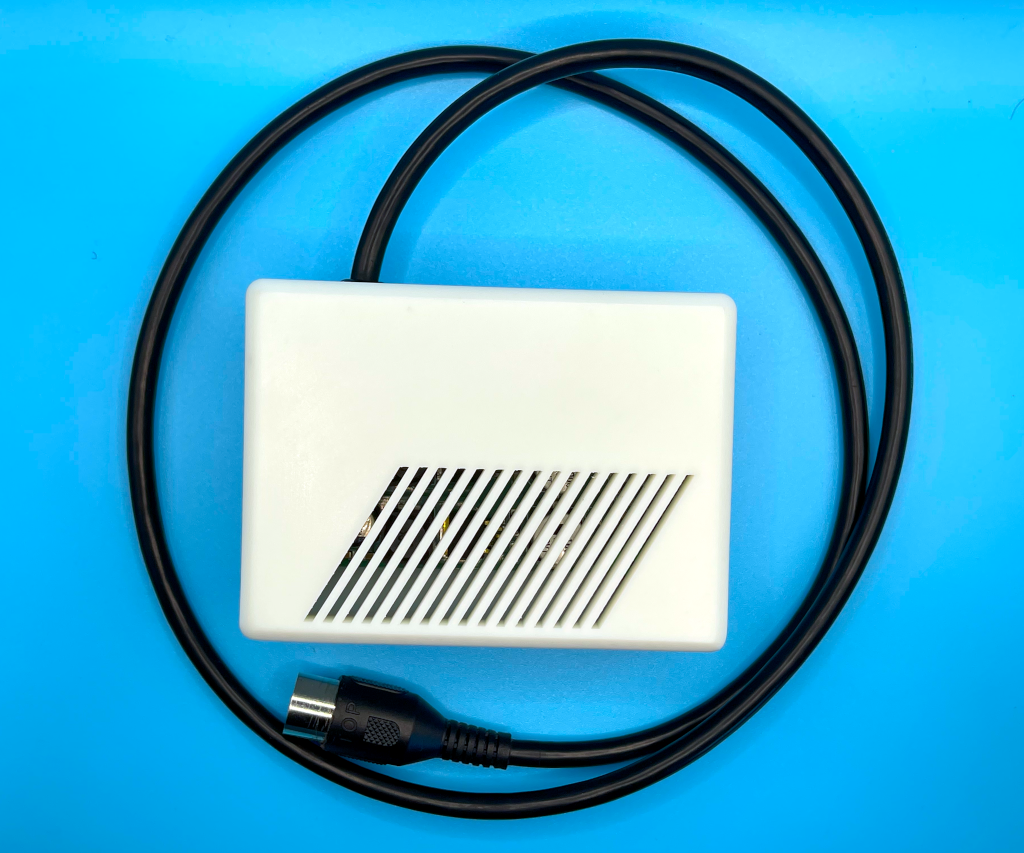
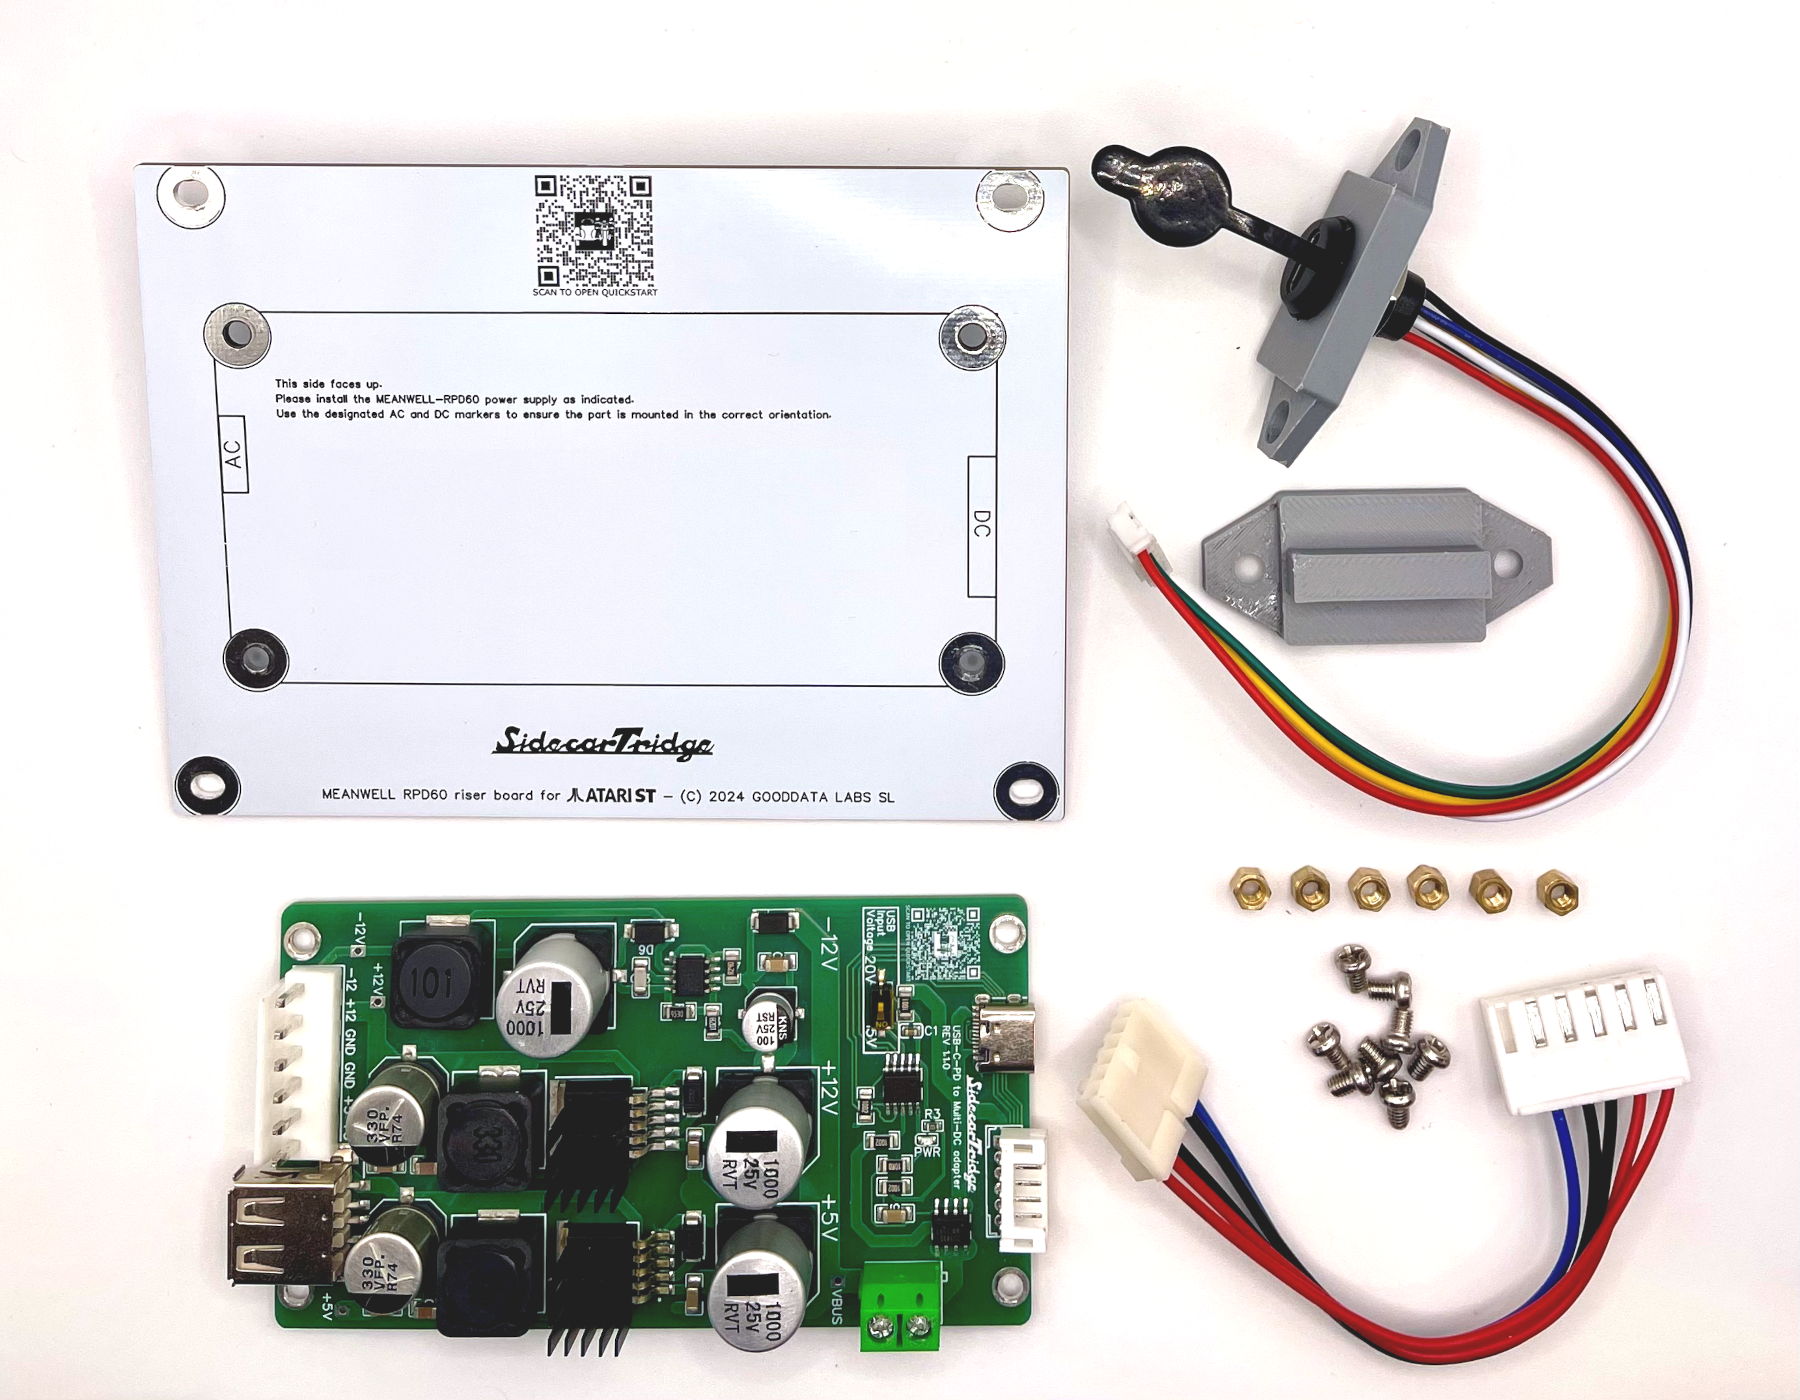
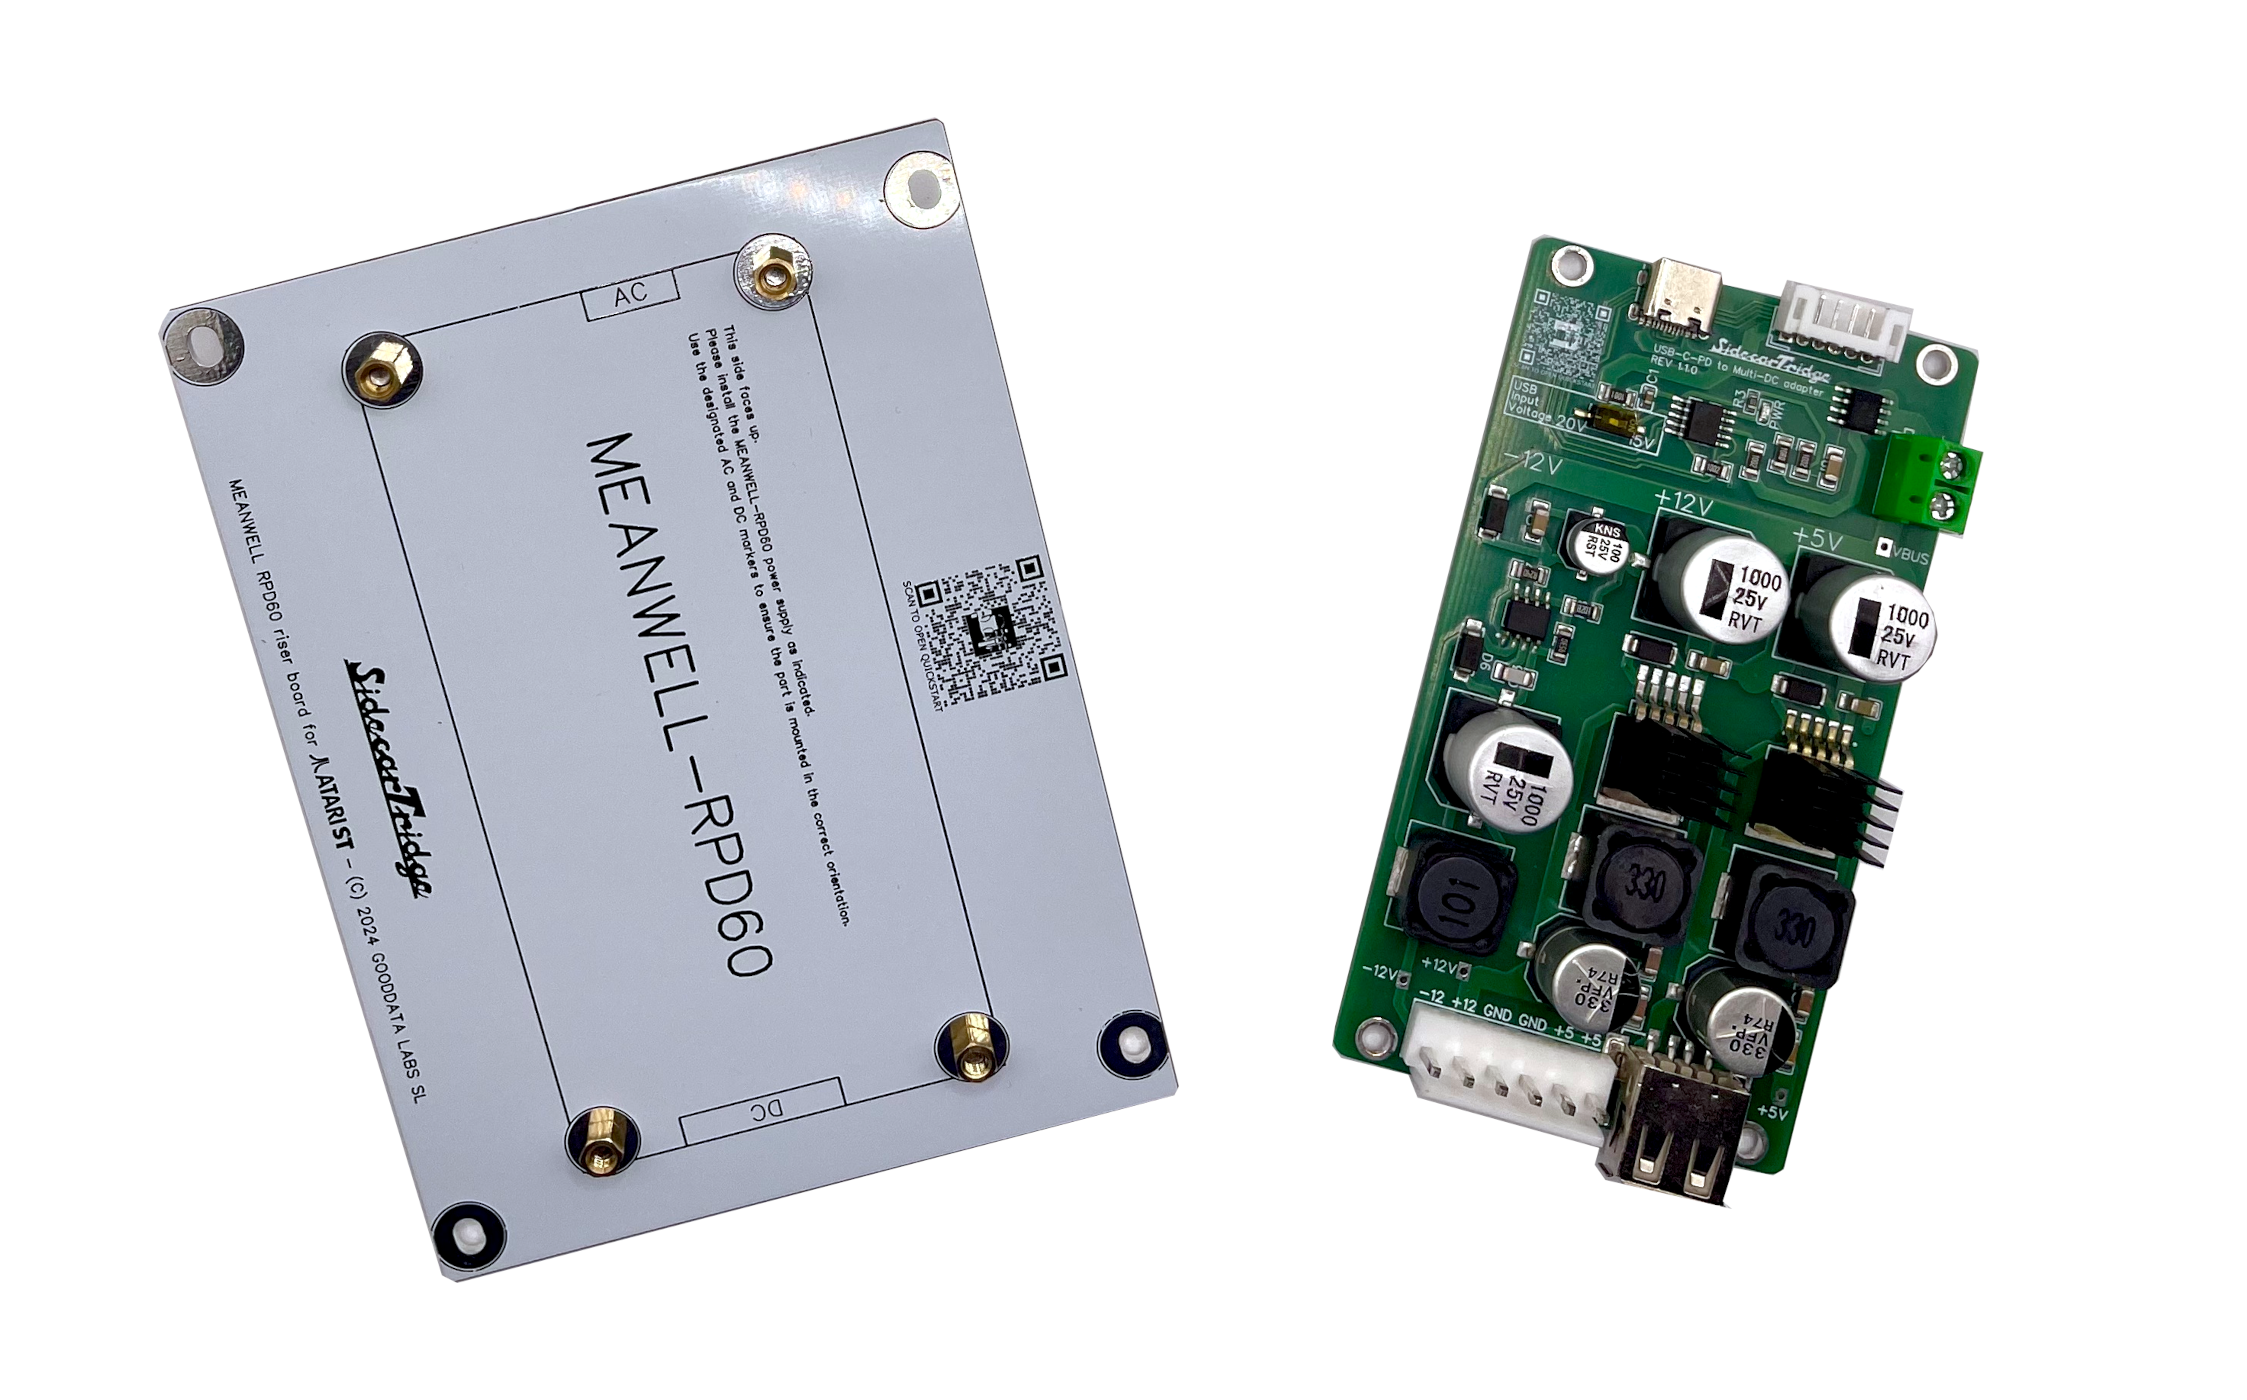
The SidecarTridge Internal USB-C PD PSU replaces the aging original PSU with a modern USB-C Power Delivery multi-rail board. Power comes in through a panel-mounted USB-C jack instead of the legacy AC inlet, so only low-voltage DC ever enters the case. Clean and stable +5V, +12V and -12V rails sized for the ST/STE/Mega mainboard plus SidecarTridge add-ons, a solderless harness that plugs straight into the factory connectors, custom riser, brackets and 3D-printed panels that replace the AC inlet and power switch. Quiet, cool and safer than a 40-year-old PSU running on dried-out capacitors.
From €35 plus taxes. Ships from Spain. Atari ST, STE and Mega ST.
Plug-in harnesses replace the original PSU connectors. No soldering on the motherboard, no chassis modifications, no permanent changes.
Clean and regulated +5V, +12V and -12V rails sized for the Atari ST family and any SidecarTridge add-ons sharing the bus.
AC mains stays in the charger. Inside the case there is only USB-C PD low-voltage DC, no live wires, no high-voltage capacitors waiting to bite.
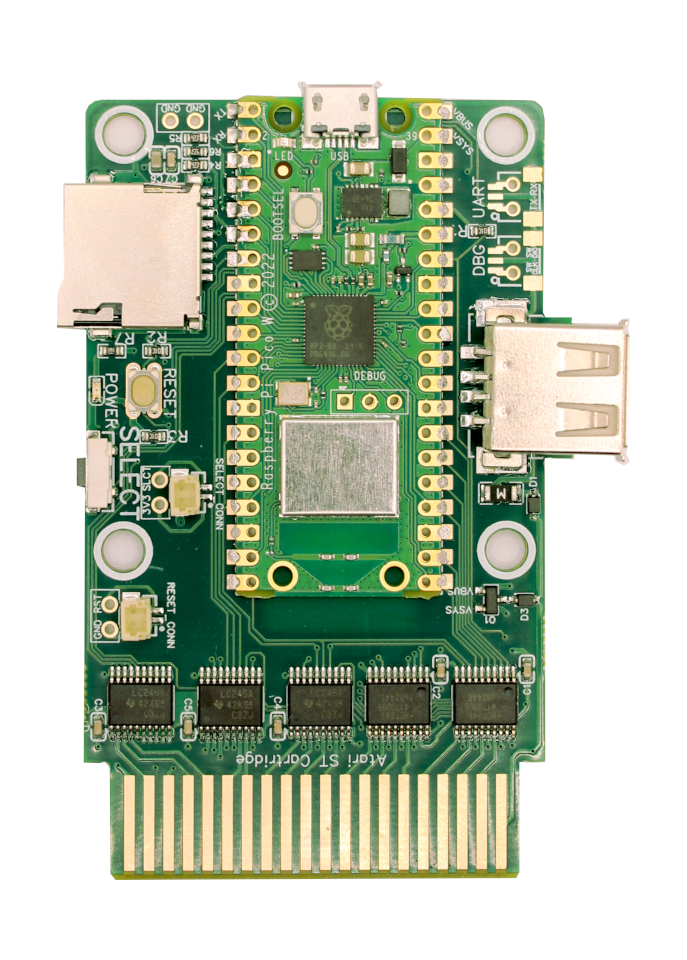
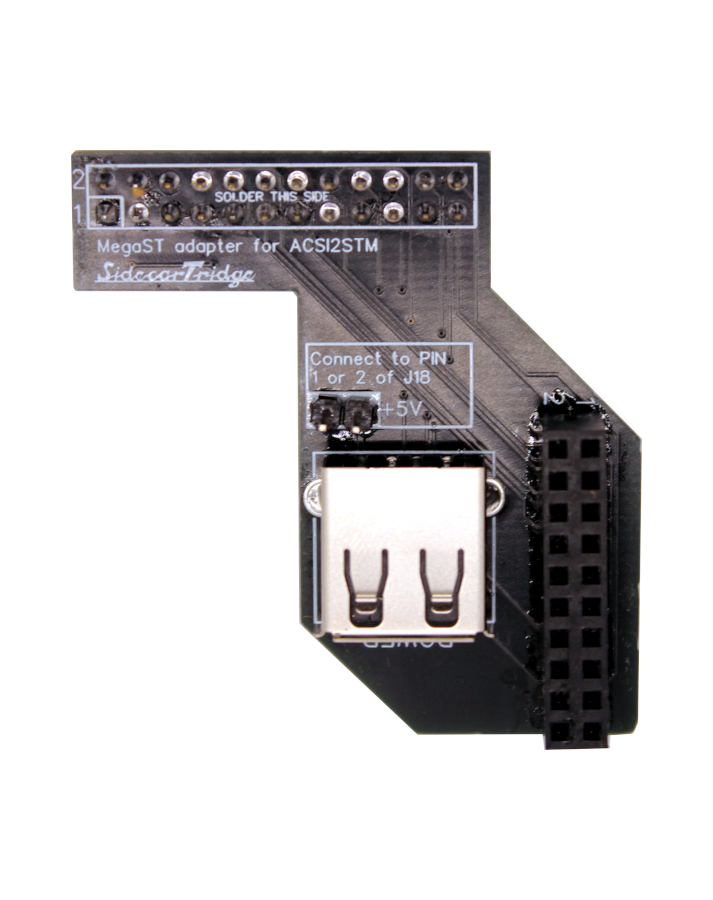
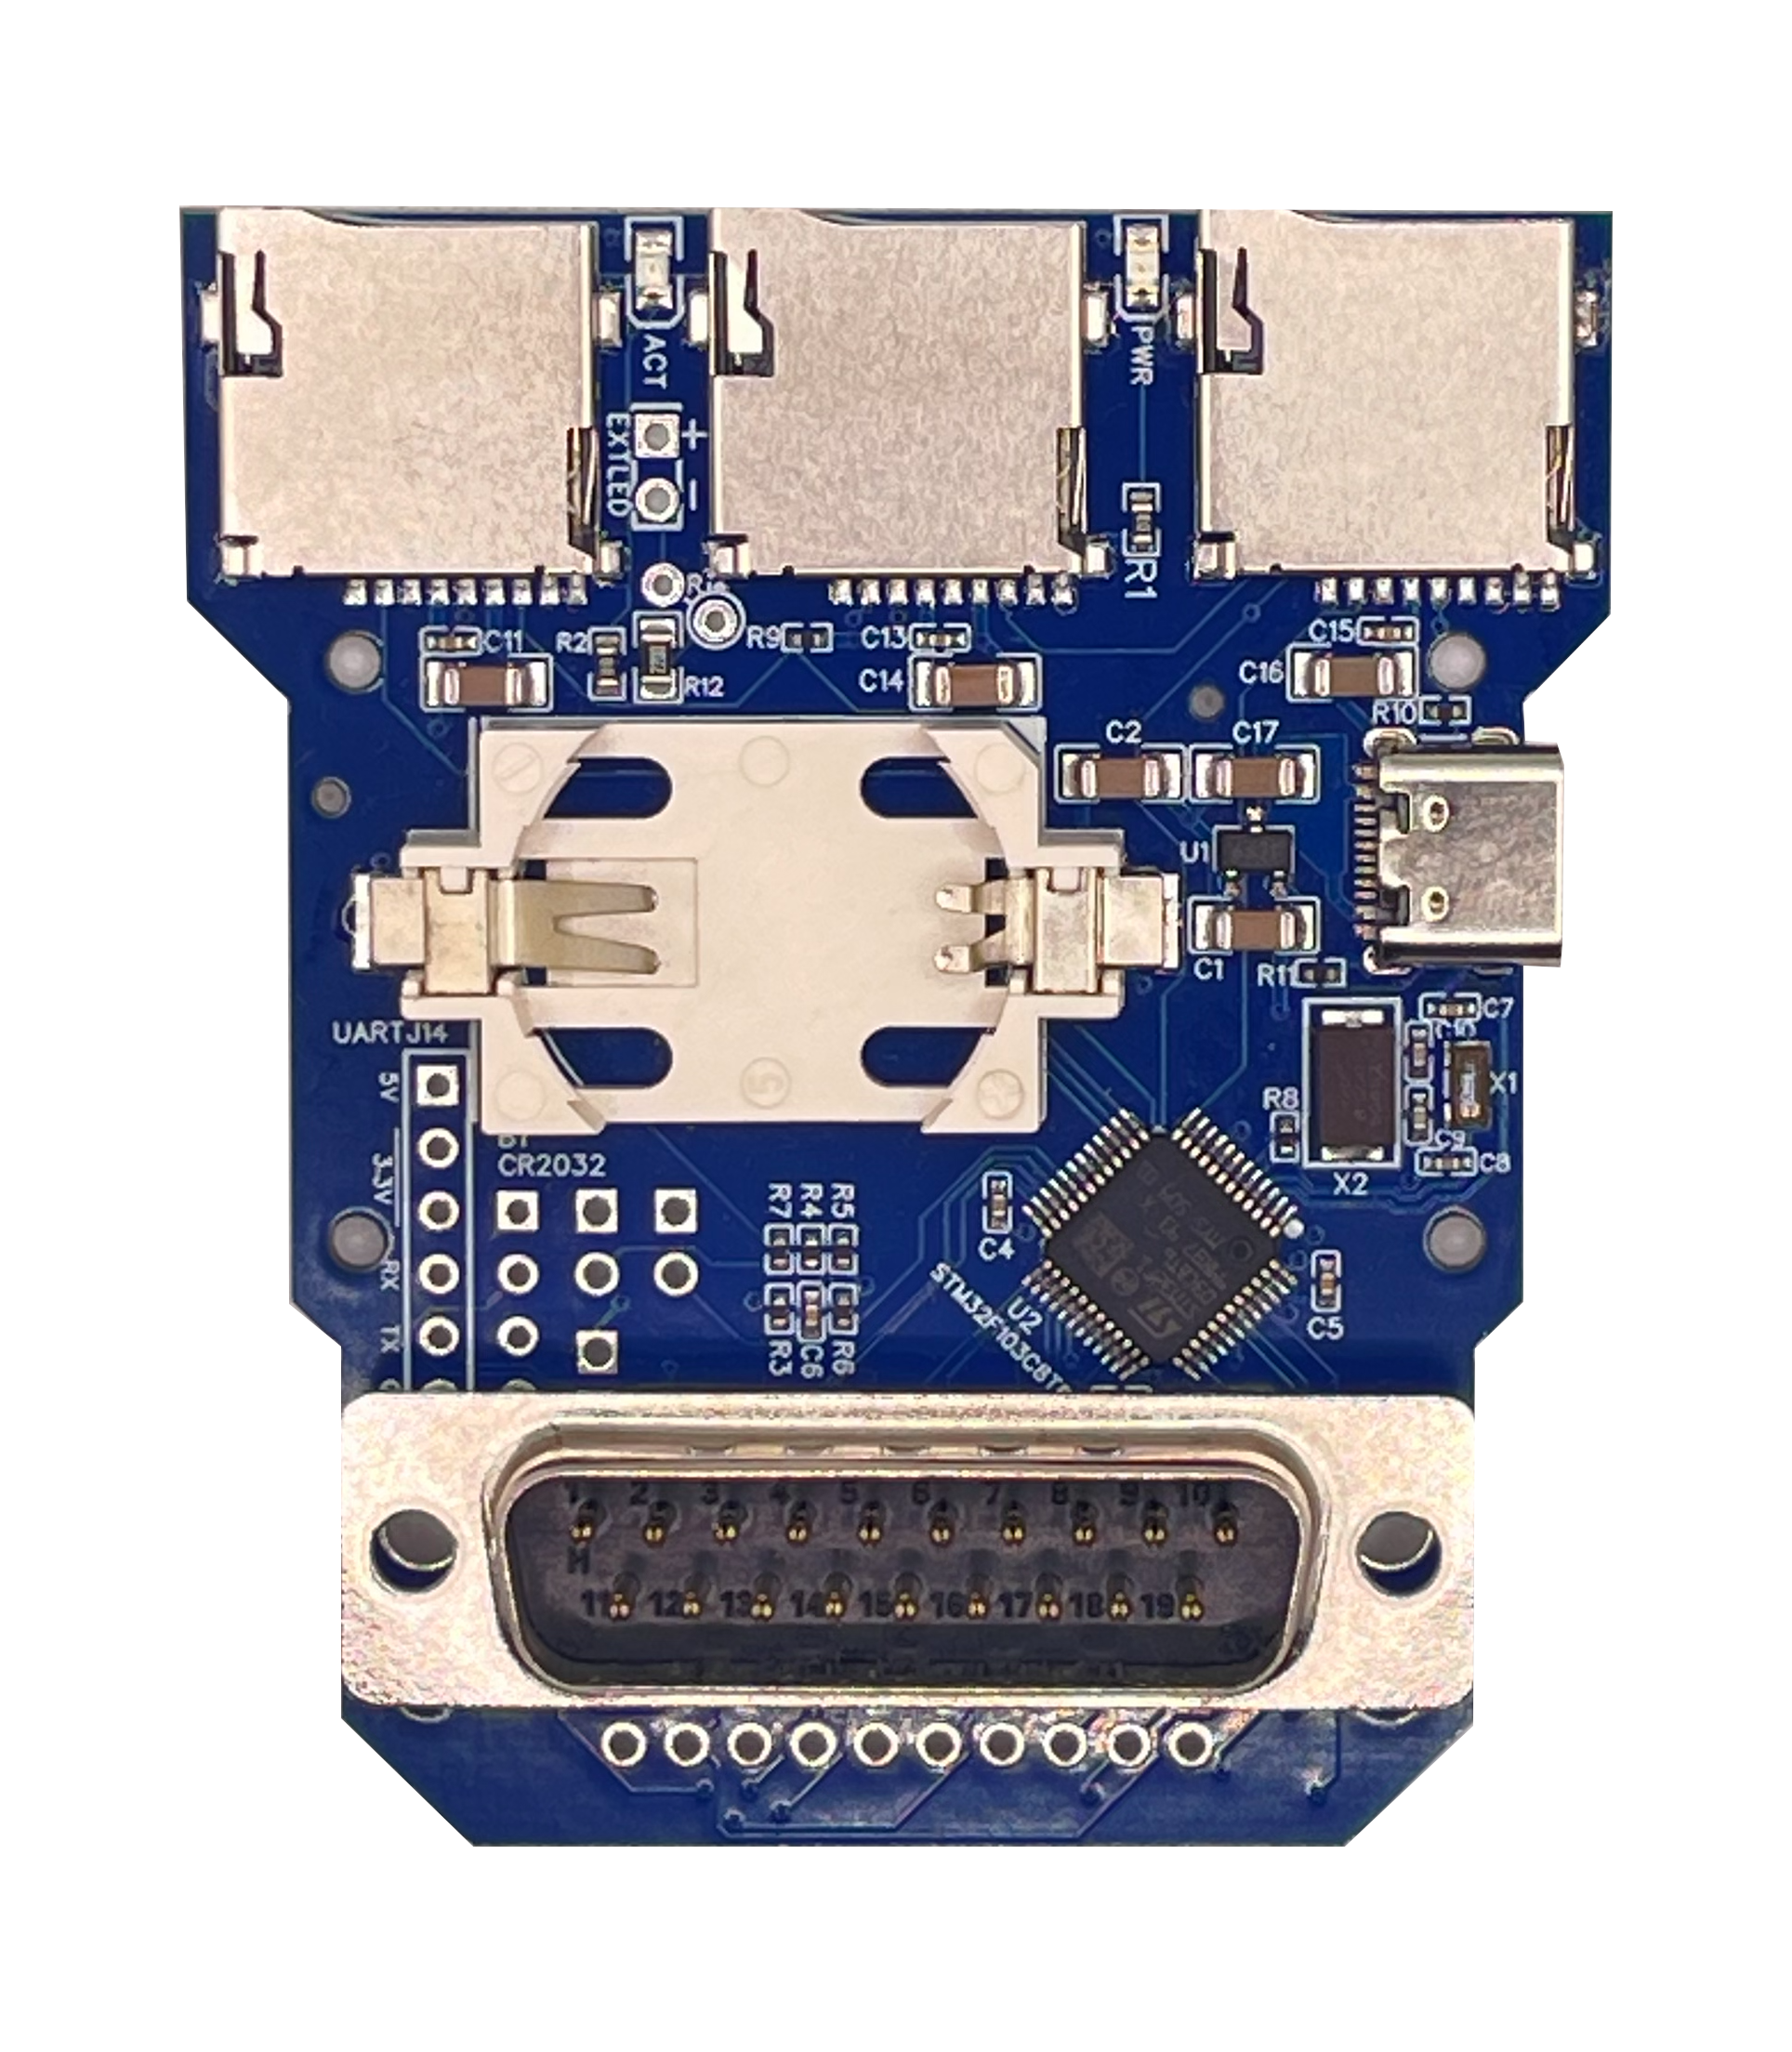
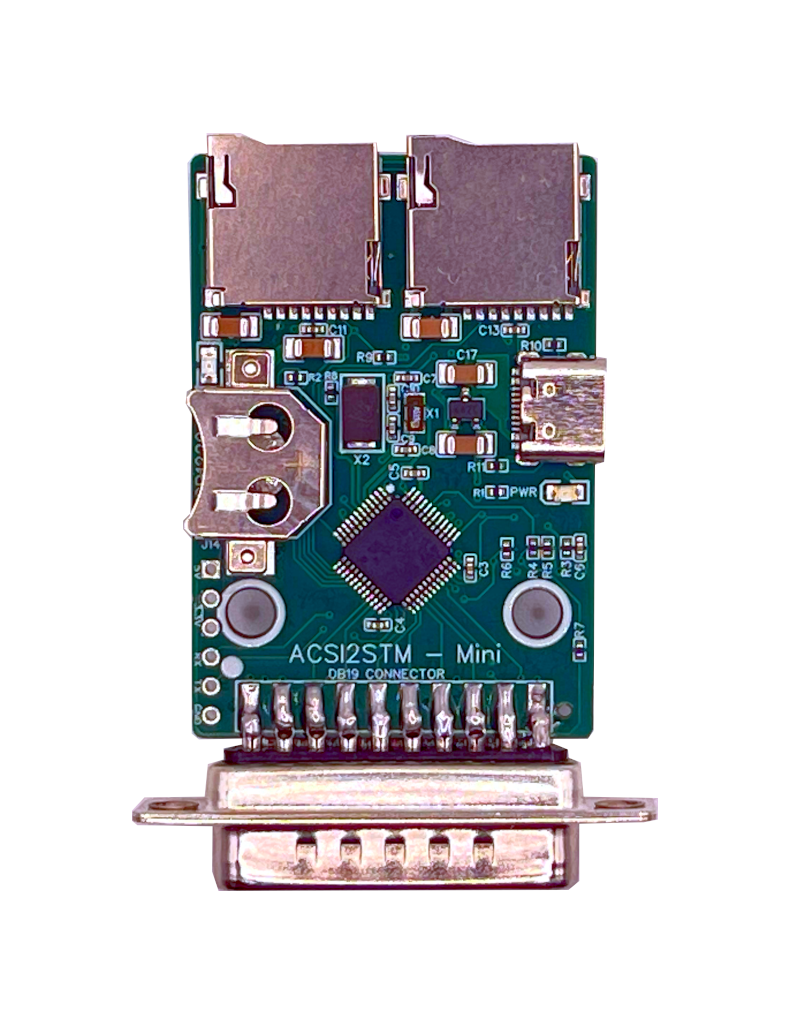
A regulated +5V USB-A port on the board powers Multi-device, ACSI2STM, Gotek or any other accessory without loading the Atari motherboard rails.
Riser PCB and brackets line up with the original mounting points. Shares the mechanical layout with the Mean Well PSU Kit. No bent metal, no plastic surgery.
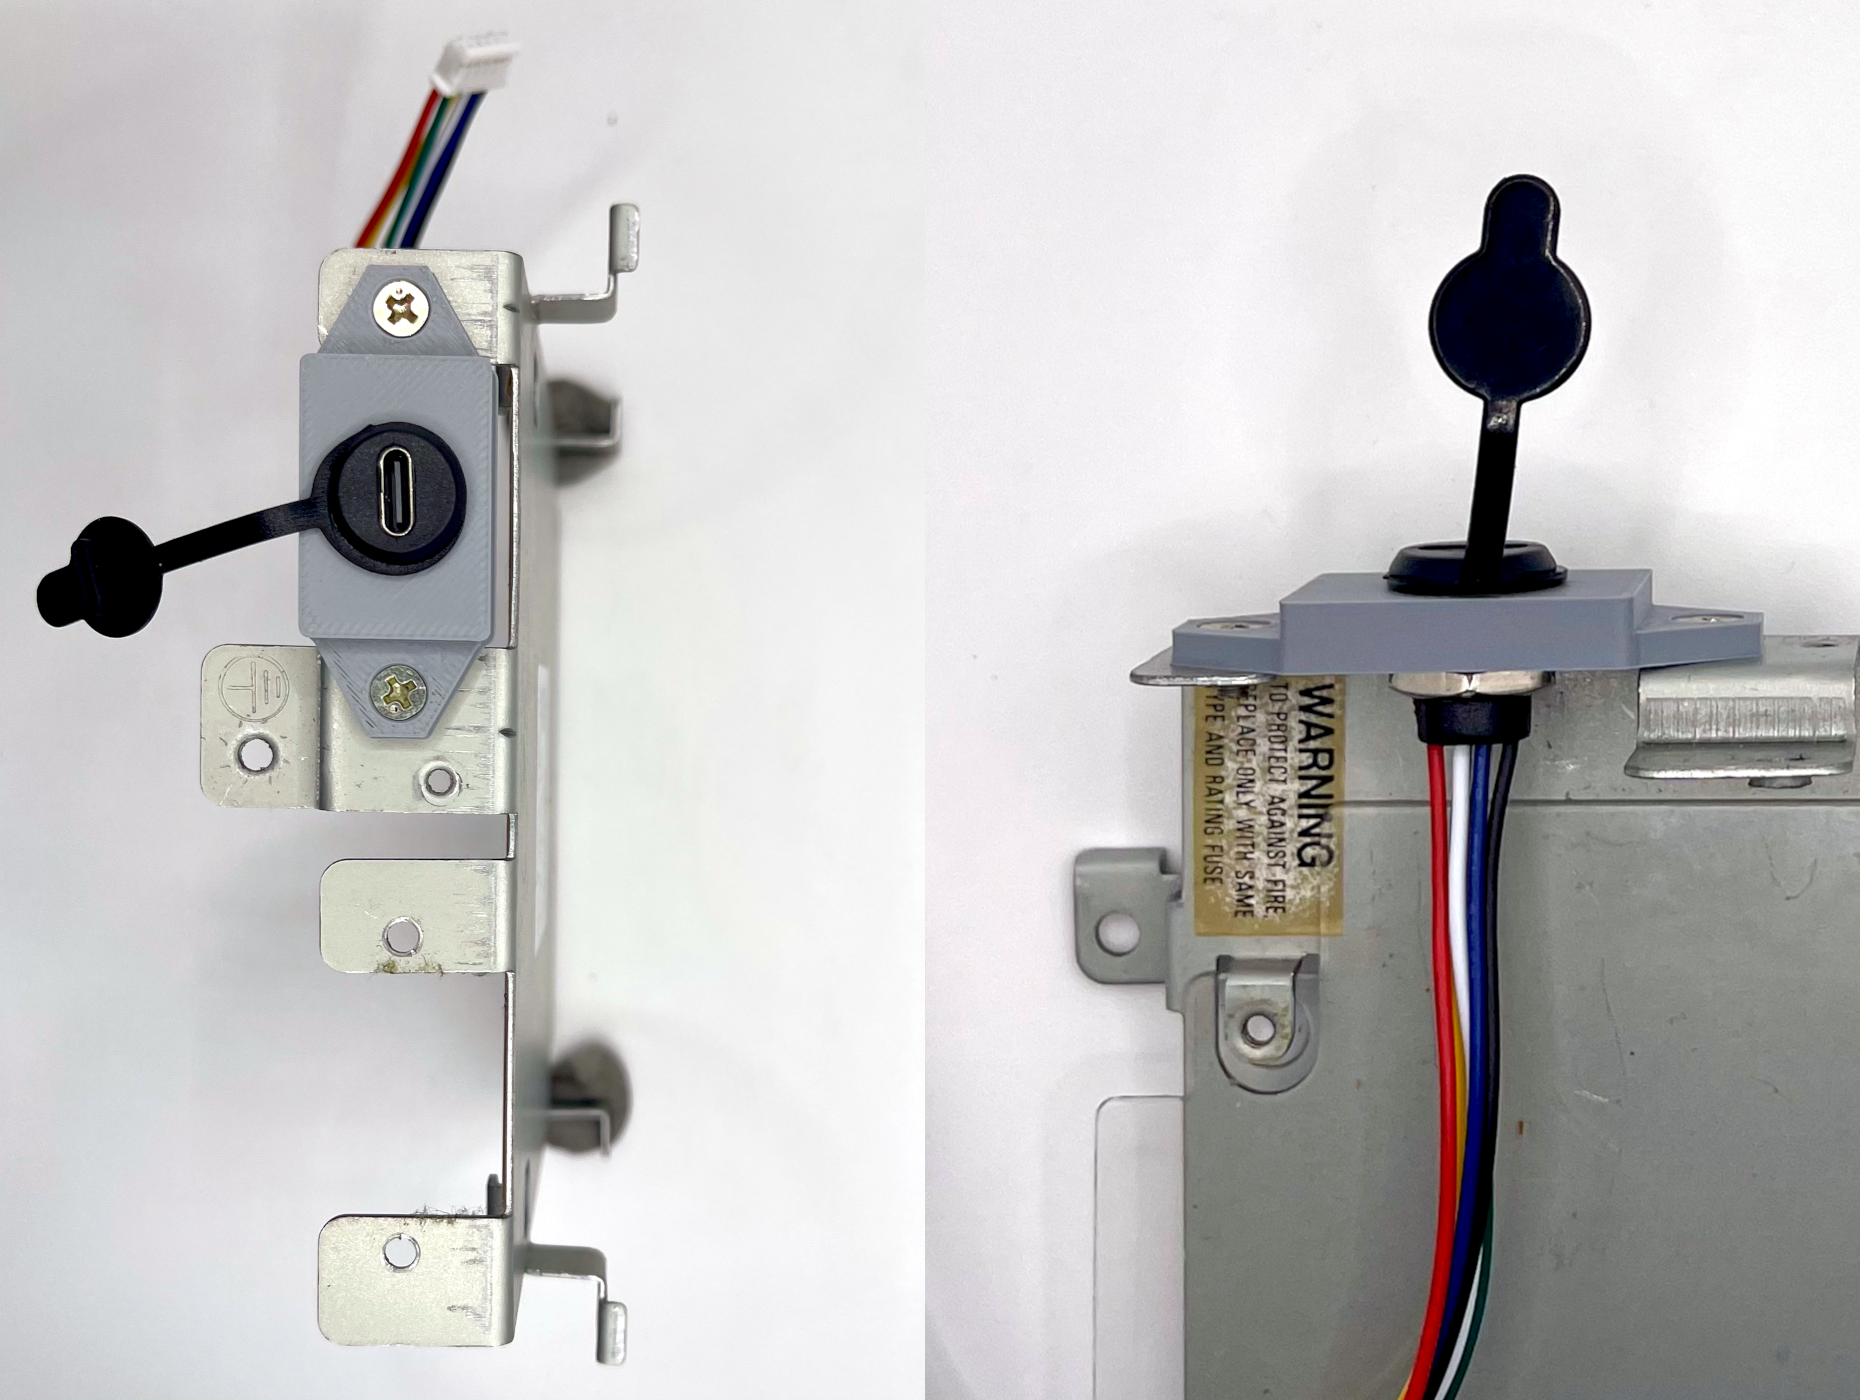
3D-printed panels replace the legacy AC inlet and power switch with a panel-mounted USB-C PD jack. The machine ends up looking stock from the outside.
from €35 plus taxes
You provide the USB-C PD charger and the USB-C cable.
Step-by-step photos and tips live in the USB-C PD PSU quickstart guide and the SidecarTridge USB-C PD PSU documentation.
| Atari model | Status |
|---|---|
| Atari ST, 1040 STF, STFM | Supported |
| Atari STE | Supported |
| Atari Mega ST | Supported |
| Atari Mega STE | Not supported |
| Atari TT | Not supported |
| Atari Falcon | Not supported |
| Atari 520ST (external brick) | Not supported |
The Atari 520ST short uses an external power brick instead of an internal PSU. For that machine, the External USB-C PD PSU is the right product.
You bring your own charger. Pick a unit that meets all of the following:
A vetted list of chargers known to work lives in the USB-C PD PSU documentation.
Atari ST (520ST internal, 1040 STF, STFM), STE and Mega ST are all supported. Mega STE, TT, Falcon and the 520ST external power brick are not. For the 520ST short with an external brick, use the External USB-C PD PSU.
The board exposes a regulated +5V USB-A port. Use it to power SidecarTridge Multi-device boards, ACSI2STM, Gotek or other accessories without loading the Atari motherboard rails.
Once correctly wired and seated, the rails are well inside the Atari ST family’s specs and you are running on a modern board instead of dried-out 40-year-old capacitors. The risk is in the wiring on your side: follow the quickstart, double-check the motherboard harness orientation, and use a certified USB-C cable.
The case is held by a handful of screws and the metal RF shield comes off with another few. On the ST and STE only the PSU portion of the shield needs to be unscrewed, on the Mega ST the full shield is removed. Both go back on at the end, so the machine ends up looking stock. With basic hand tools and 30 minutes of patience, this is an approachable job for a hobbyist. There are also video walkthroughs online for opening the case.
No. The motherboard side is plug-and-play through the supplied harness. The DC side from the USB-C jack to the board uses a pre-terminated JST-PH 2.0 cable.
A 60 W USB-C PD 3.0 charger with both 15 V and 20 V profiles, plus a certified USB-C cable. Avoid unbranded chargers, PD 3.1 EPR units, and multiport bricks where the chosen port de-rates below 60 W. Most modern laptop and tablet chargers from reputable brands meet these requirements. A vetted list of tested chargers lives in the docs.
Some PD 3.1 chargers with Extended Power Range (EPR) do not negotiate correctly with this board even when they advertise PD 3.0 fallback. Stick to PD 3.0 chargers from the tested list when in doubt.
Yes, if you are comfortable opening the case, you want a modern low-voltage DC PSU with no AC mains inside, and you already own (or are happy to buy) a quality USB-C PD charger. The Internal USB-C PD PSU is a homebrew product built for hobbyists who want a quiet, safe and future-proof replacement for their original PSU. It is not a sealed appliance, and it is not the right pick if you prefer an industrial-grade AC PSU inside the case (look at the Mean Well PSU Kit for that).
Access to our products and community spaces requires basic respect. We have zero tolerance for harassment, personal attacks, abusive behaviour or defamatory content toward our team or community. The principle is simple: don’t be abusive. If that principle is violated, access is revoked. We build for people who enjoy experimenting, not for people creating hostility.
This product has been assessed for European (CE) and UK (UKCA) conformity. Official Declarations of Conformity and EMC Assessment reports (USBC-PD-PSU REV1.1.0):