
ACSI2STM internal riser boards Quickstart
This quickstart covers the first installation steps for the ACSI2STM internal riser boards used with the ACSI2STM Compact on Atari Mega ST and Atari Mega STE systems.
It is focused on the minimum safe path from compatibility check to first internal installation and power-on.
If you want the broader reference for compatibility notes, installation details, and troubleshooting, continue later with the full documentation.
Before You Buy
These riser boards are designed for:
- Atari Mega ST
- Atari Mega STE
They require:
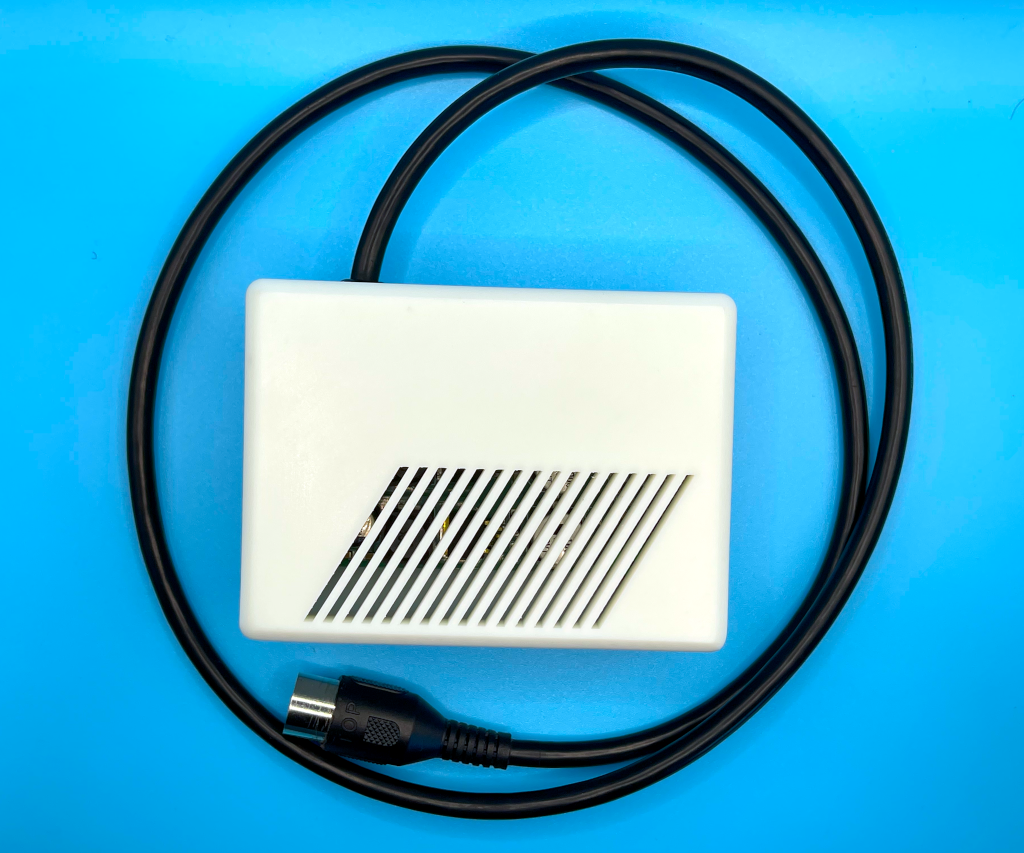
- an ACSI2STM Compact
- the rear IDC 20-pin connector on the Compact board
- opening the computer case for internal installation
They are not compatible with the ACSI2STM Mini. Compatibility with third-party ACSI2STM variants is not guaranteed.
What You Need
Before you begin, prepare:
- the correct riser board for your machine (Mega ST or Mega STE)
- an ACSI2STM Compact
- the included USB-A to USB-C power cable
- for Mega ST only: the included red Dupont power lead
- a Phillips screwdriver
- an anti-static wrist strap if available

Step 1: Check That You Have the Right Compact Board
Before opening the Atari, check the ACSI2STM Compact itself.
Make sure:
- you are using an ACSI2STM Compact, not the Mini
- the board has the rear IDC 20-pin connector required by the riser
- the connectors are straight and there is no visible shipping damage
If the Compact does not have the rear IDC 20-pin connector, stop here. The riser board cannot be installed.
Step 2: Open the Computer and Plan the Installation
- Power off the Atari completely.
- Disconnect it from mains power.
- Open the case carefully.
- Identify the internal area where the riser board and ACSI2STM Compact will sit.
Before proceeding, do a quick visual check:
- no cable should be trapped under the board
- the Compact should not interfere with the drive area or shielding
- the USB-C power cable should have a clean routing path
Take your time here. These machines are old, and forcing plastic parts, cables, or shielding is the fastest way to turn a simple installation into a repair job.
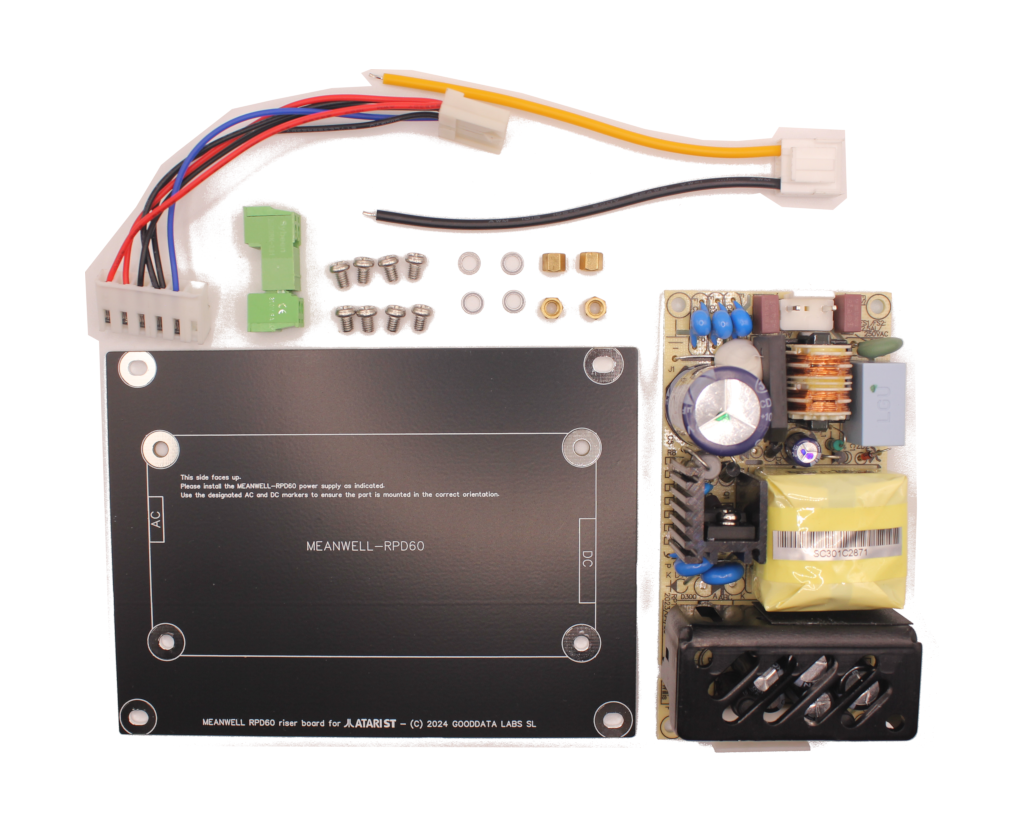
Step 3: Install the Correct Riser Board
Use only the riser board made for your machine.
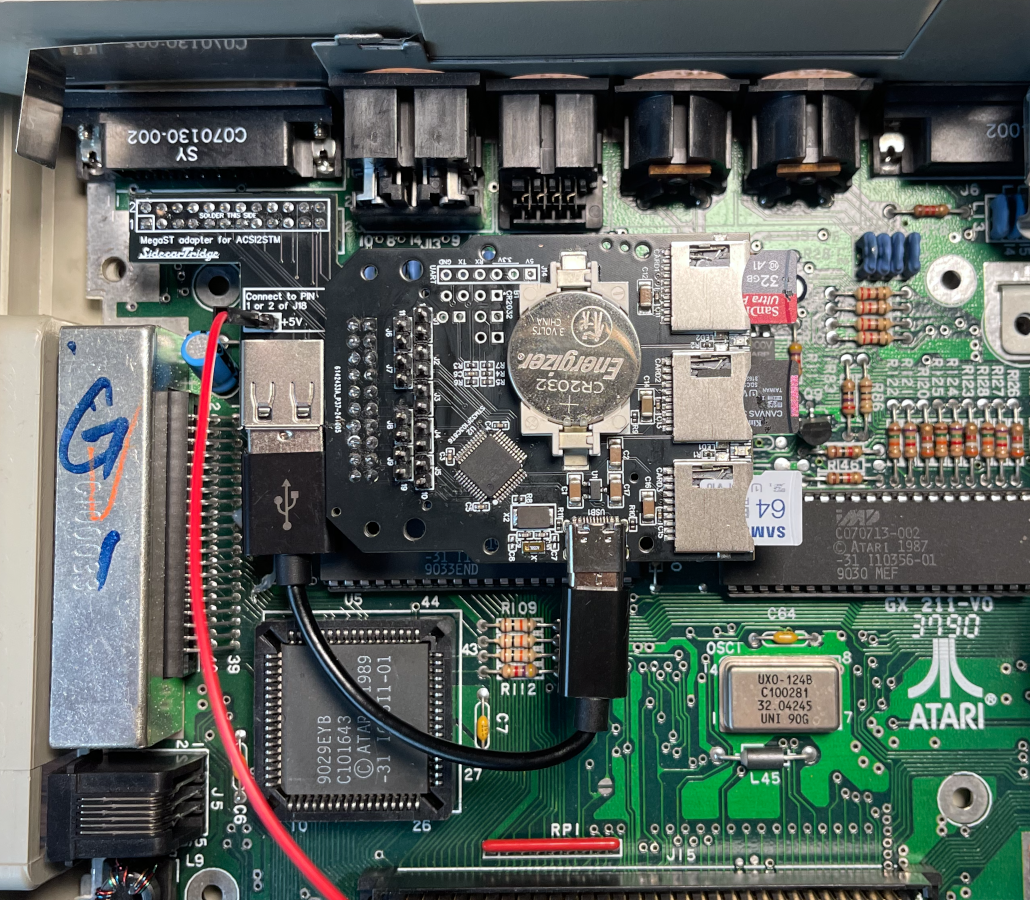
Mega ST
Install the Mega ST riser board and seat the ACSI2STM Compact on the IDC 20-pin connector.
Check carefully that:
- the Compact is fully seated
- the board is not twisted
- there is no lateral stress on the pins
Mega STE
Install the Mega STE riser board and seat the ACSI2STM Compact on the IDC 20-pin connector.
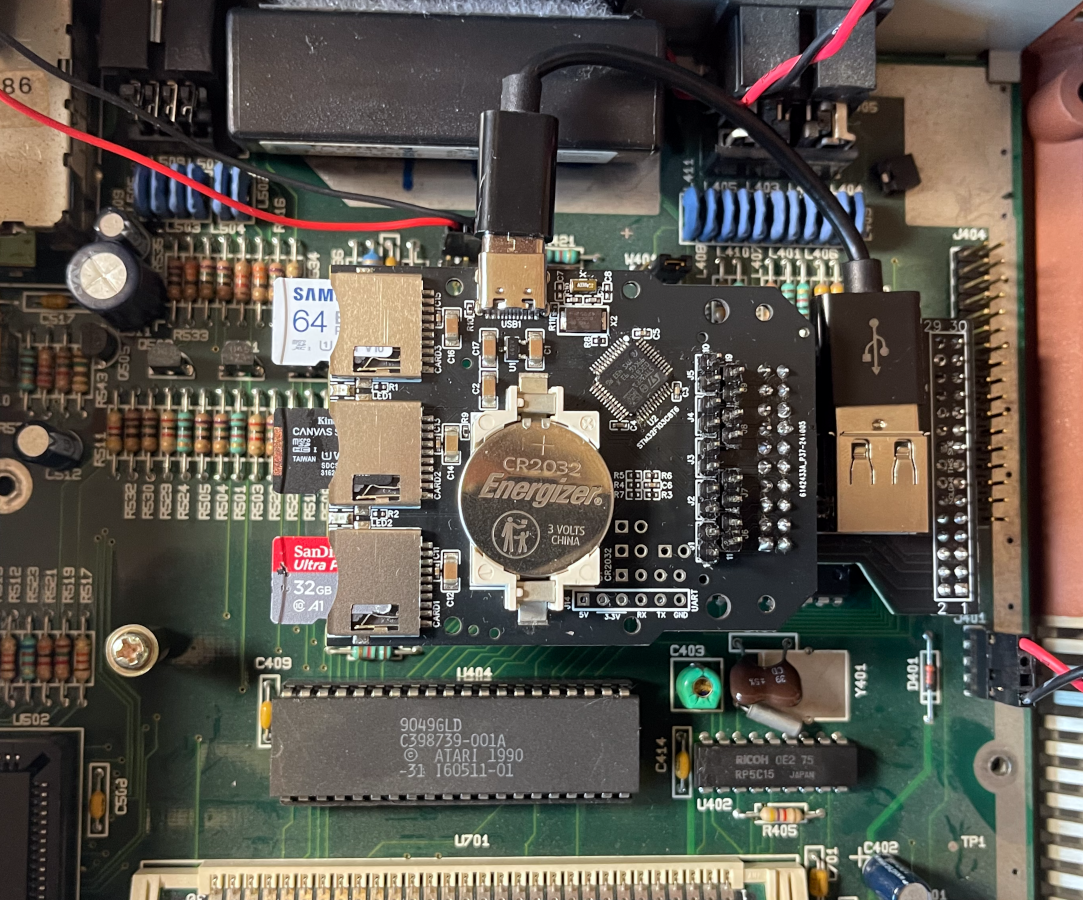
Again, make sure:
- the Compact sits flat
- the riser is aligned correctly
- the connector is fully engaged
Step 4: Connect Power
Both kits use the included USB-A to USB-C cable to power the ACSI2STM Compact internally.
Mega ST power connection
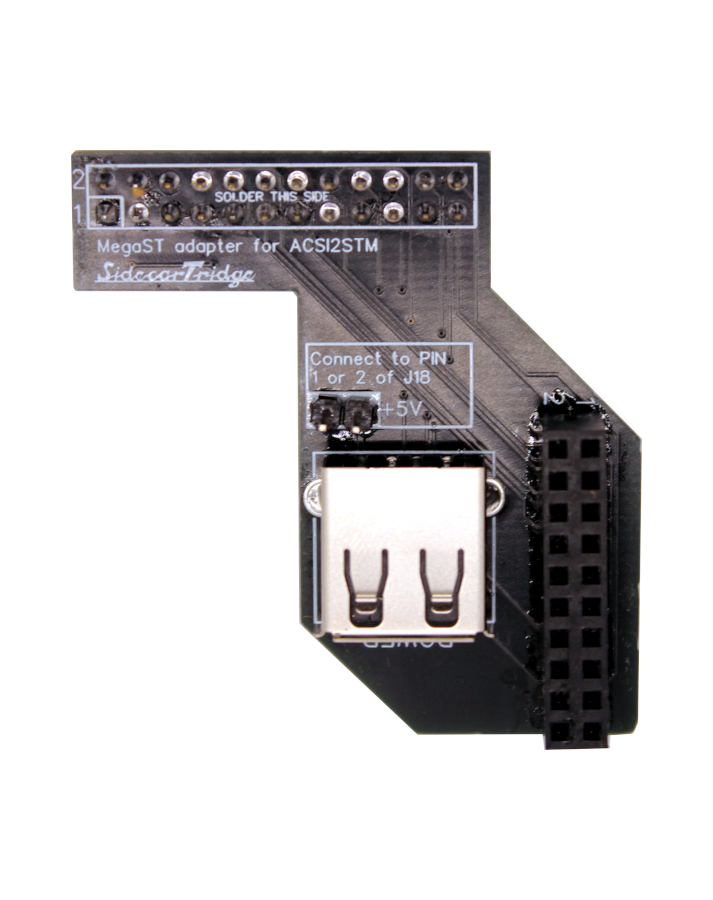
The Mega ST kit also includes the extra red Dupont power lead. Use the supplied lead and the included pins to supply 5V power only from connector J18 on the Mega ST motherboard.
Use pin 1 or pin 2 of J18, which both provide 5V.
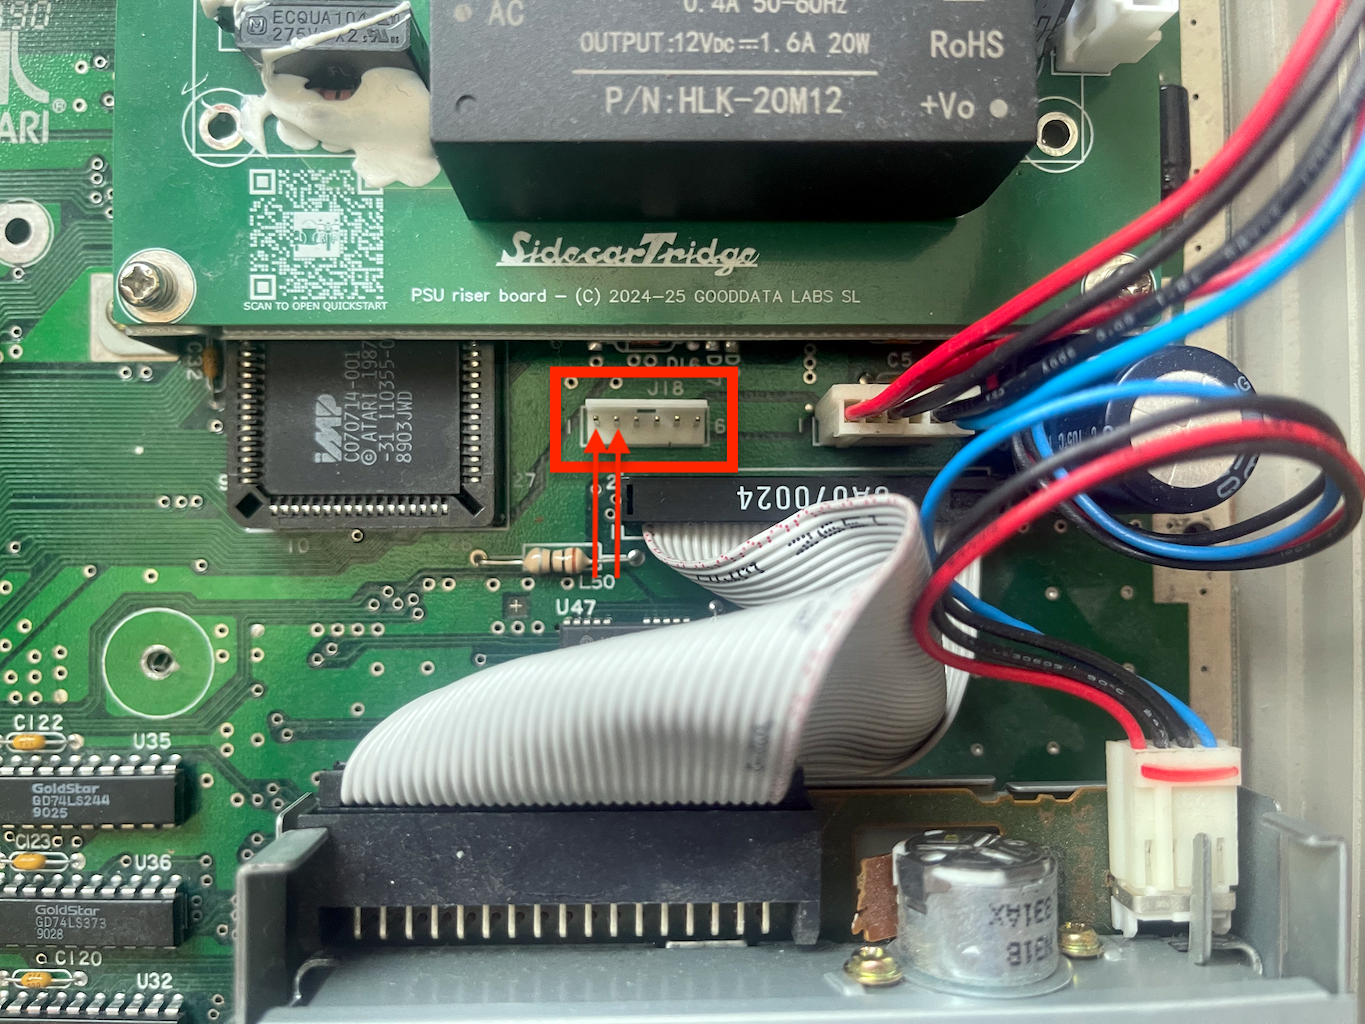
If you are not sure about this connection, stop and double-check before applying power. Do not improvise with other motherboard points.
Mega STE power connection
The Mega STE kit does not use the extra Dupont power lead included with the Mega ST version. Just connect the included USB-A to USB-C cable between the riser board and the ACSI2STM Compact.
Step 5: First Test Before Closing the Case
Before fully reassembling the machine:
- Check that the Compact is stable.
- Check that no cable is pinched.
- Check that the USB-C lead is not sharply bent.
- Reconnect power and perform a first test boot.
Expected result:
- the Compact powers on correctly
- the Atari detects the storage device normally
- the case can be closed without crushing cables or forcing the assembly
Do not connect or disconnect internal connections while the system is powered on.
What’s Next?
This quickstart covers only the first installation path. For the complete reference, continue with:
- Riser board documentation
- ACSI2STM main documentation
- ACSI2STM product page
- Riser board product page
Need Help?
Check the riser board documentation, or visit our contact page if you need help with compatibility or installation.